
How to restore period features in an old house
Many heritage homes harbour beautiful antique features that are just waiting to see the light again. Here's how to uncover them and breathe new life into these historic gems
Heritage homes and listed building consent
Whether you own a Victorian house with intricate ceiling roses, an Italianate residence with elaborately ornamented doorways, or an Edwardian home with an original tiled fireplace, it’s likely that much of your property’s value and architectural interest lies in the character of its period features.
Therefore, if you're tackling a renovation project, it's important to make sure that any restoration work is carried out carefully and sensitively – the old fabric may be weak or flimsy, particularly if it’s not been well cared for in the past. If you're unsure, it's always a good idea to consult an expert where necessary.
UK homeowners with a listed property will need to seek listed building consent before carrying out any works. Plus, if your house is in a Conservation Area or Area of Outstanding National Beauty, planning permission will be required. In the US, homes listed on the National Register of Historic Places might require a permit for any alterations. It’s worth checking with your local municipal authority, too, as many localities have their own special historic districts.
How to restore wood beams
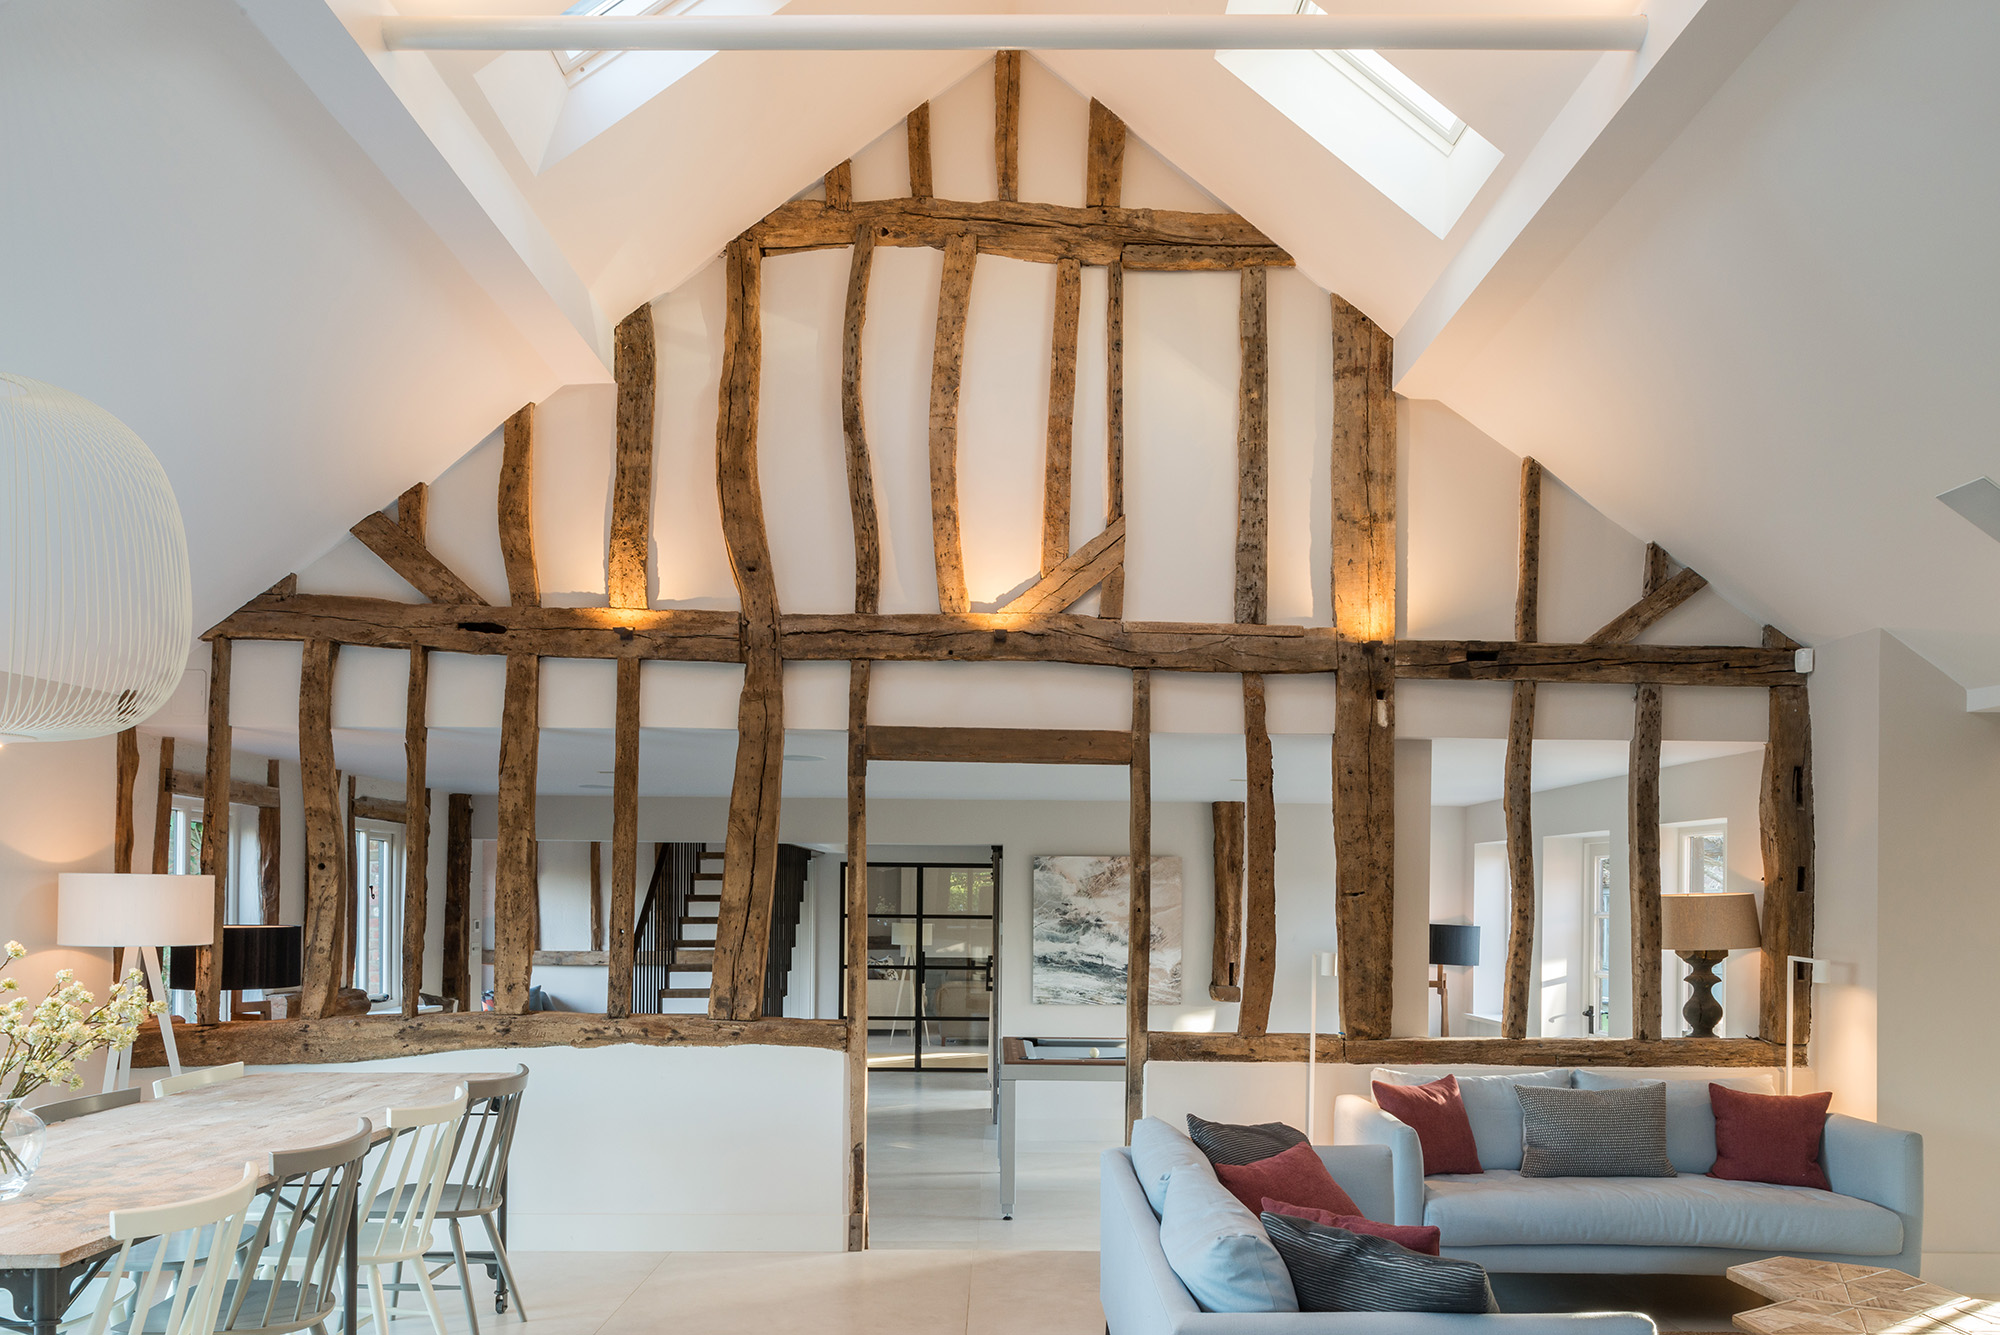 In this historic scheme, stunning original beams take centre stage. Image: Gresford Architects
Few historic features can infuse a property with quite as much wow-factor as timber beams. You’ll find exposed ceiling joists in a host of properties, from medieval barn conversions to cottages built in the 1900s. Exposing the unique character of the timber may involve removing paint and finishes that have been slapped on top, or even carrying out more involved repairs.
Look out for evidence of woodworm, which can be treated using insecticide. If the beam plays a structural role and has been significantly damaged by infestation, you’ll need to call in a structural engineer to evaluate the extent of the damage and advise on what repairs will be needed.
To reinstate a rustic look, strip back and remove paint or glossy finishes from the timber. Whichever product you are using as a paint stripper, be sure to test it on a small area of wood to make sure it works effectively and doesn’t damage the grain. Sanding is also effective, but this can be time-consuming and messy.
Once the beams have been stripped back, they can be finished with a wood stain, varnish or oil.
Restoring heritage windows
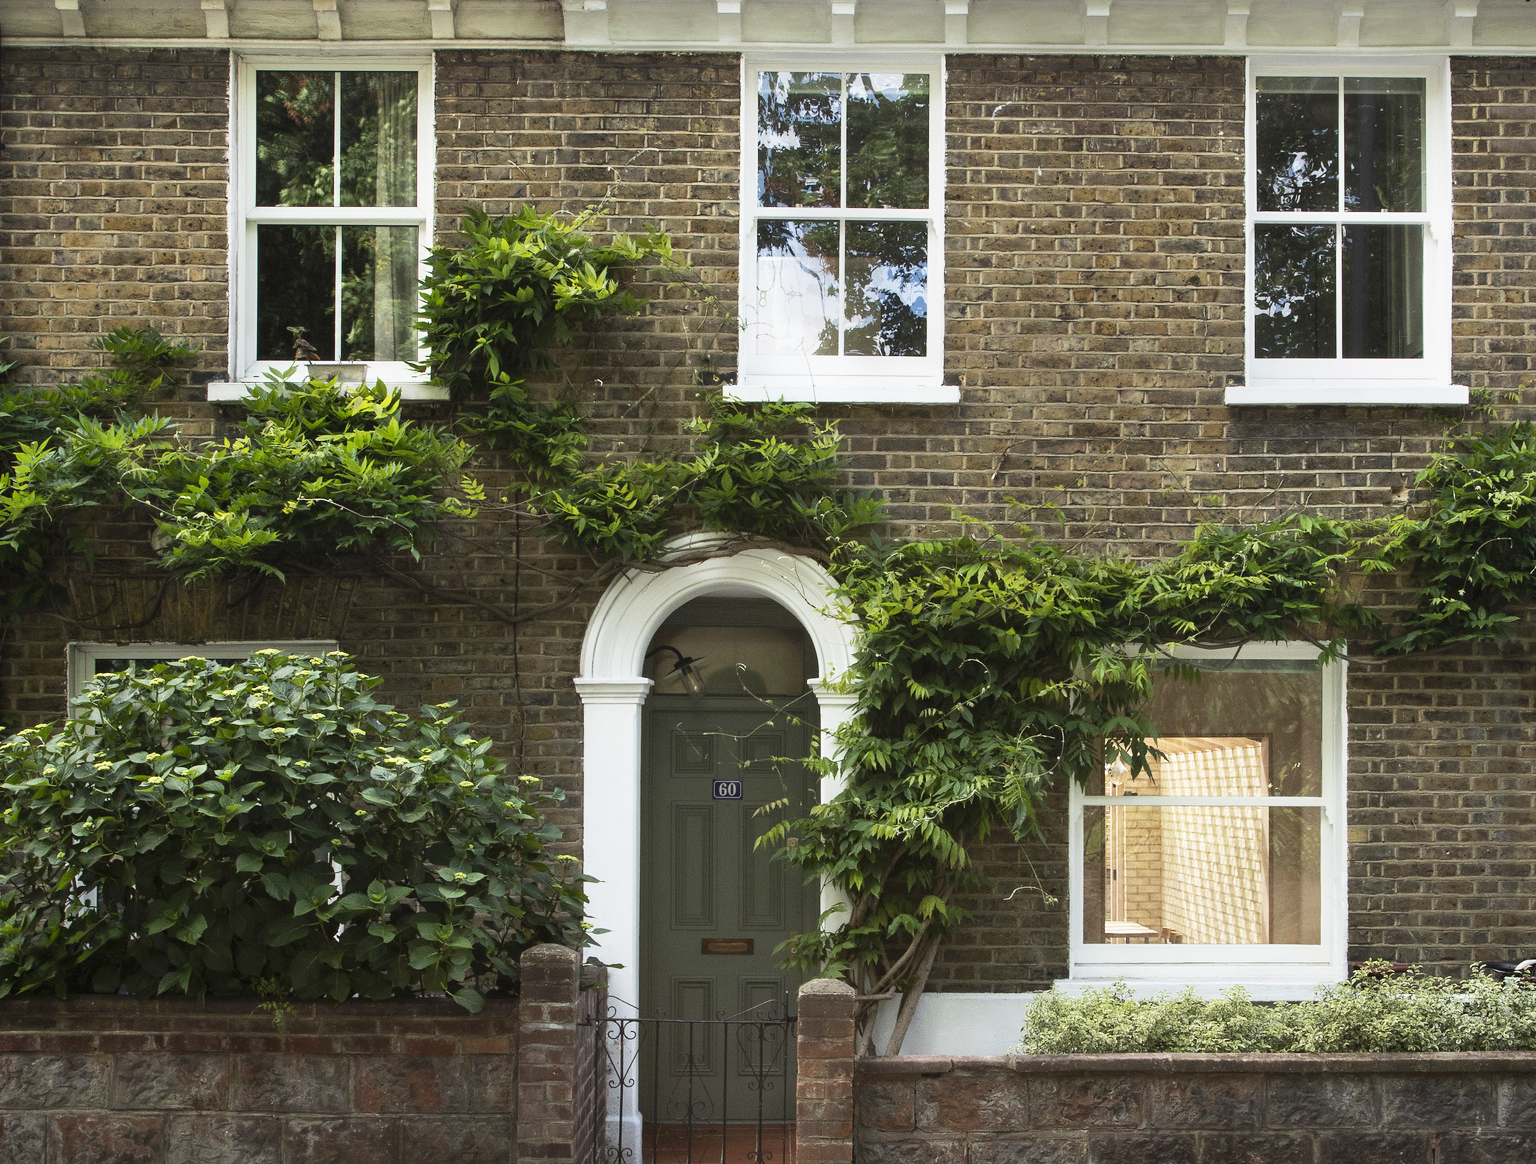 Following a complete overhaul, these sash windows have been returned to their former glory. Image: Oliver Leech Architects/Stale Eriksen
Windows play an important role in setting the overall tone for your home’s appearance. Common issues include flaking paint, rotting wood and stuck sliding mechanisms – all problems that can be addressed via careful restoration work.
Spongy, rotten timber can be dug out to the level of sound wood. Then, new sections that have been moulded to match the originals can be spliced back into the frame, sealed, primed and painted. This is a job best left to a specialist window restorer. According to London Sash Window Repairs, an overhaul or draughtproofing service is likely to cost between £240 - £360 per window.
Another common issue is overpainting, with layers and layers building up over the years causing stiffness in the sliding mechanism. Sanding down and re-painting can help resolve this issue – but be sure to steer clear of impermeable modern finishes as they may lock moisture inside the frame and lead to damp.
How to repair an old wooden door
 These warm wooden doors are the perfect addition to a rustic, homely bedroom. Image: Mary/Airbnb
Georgian, Victorian and Edwardian doors typically feature characterful panelling, however, 1960s homeowners often rejected these intricate details, nailing new panels over the top to establish a smooth surface across the whole door. If you suspect this to be the case in your home, removing the wood overlay to reveal the original timber beneath could be one of the greatest triumphs of your renovation.
“If the doors are of good quality, they can be stripped down, repainted and given new beading and detailing to enhance and transform their look,” says Andy Young, founder and director of building and design firm Create Bespoke.
The cheapest option is to have doors dipped into a water-based chemical solution to remove old layers of paint and gloss. However, it’s worth noting that the chemicals used in this process may damage the door itself. You’ll also need to remove any ironmongery before they’re dipped.
To avoid the risks associated with dipping, employ a professional to strip the door by hand. To have a door hand-stripped, sanded and re-coated in wax or oil, expect to pay within the region of £50 per door.
If you know that the door has already been stripped and repainted since the 1960s, you can remove old paint by brushing on a product such as Nitromors and scraping old finishes off. If any of the paint pre-dates the 1960s, however, it may contain lead. Removing it yourself could pose a significant health risk, so you should seek out the assistance of a specialist.
Discover how to revive a faded wood door:
Restoring old wood panelling
Panelling is a common sight in many period properties and adds plenty of character and elegant appeal. Over time, the colour of the panels may fade or become distorted – but this doesn’t mean they have to be ripped out.
A good clean to remove dust and other pollutants may be all that’s needed to spruce up tired panels. Use an oil-based soap for the job. Nicks and small scratches can be covered with wood stain and a cotton bud.
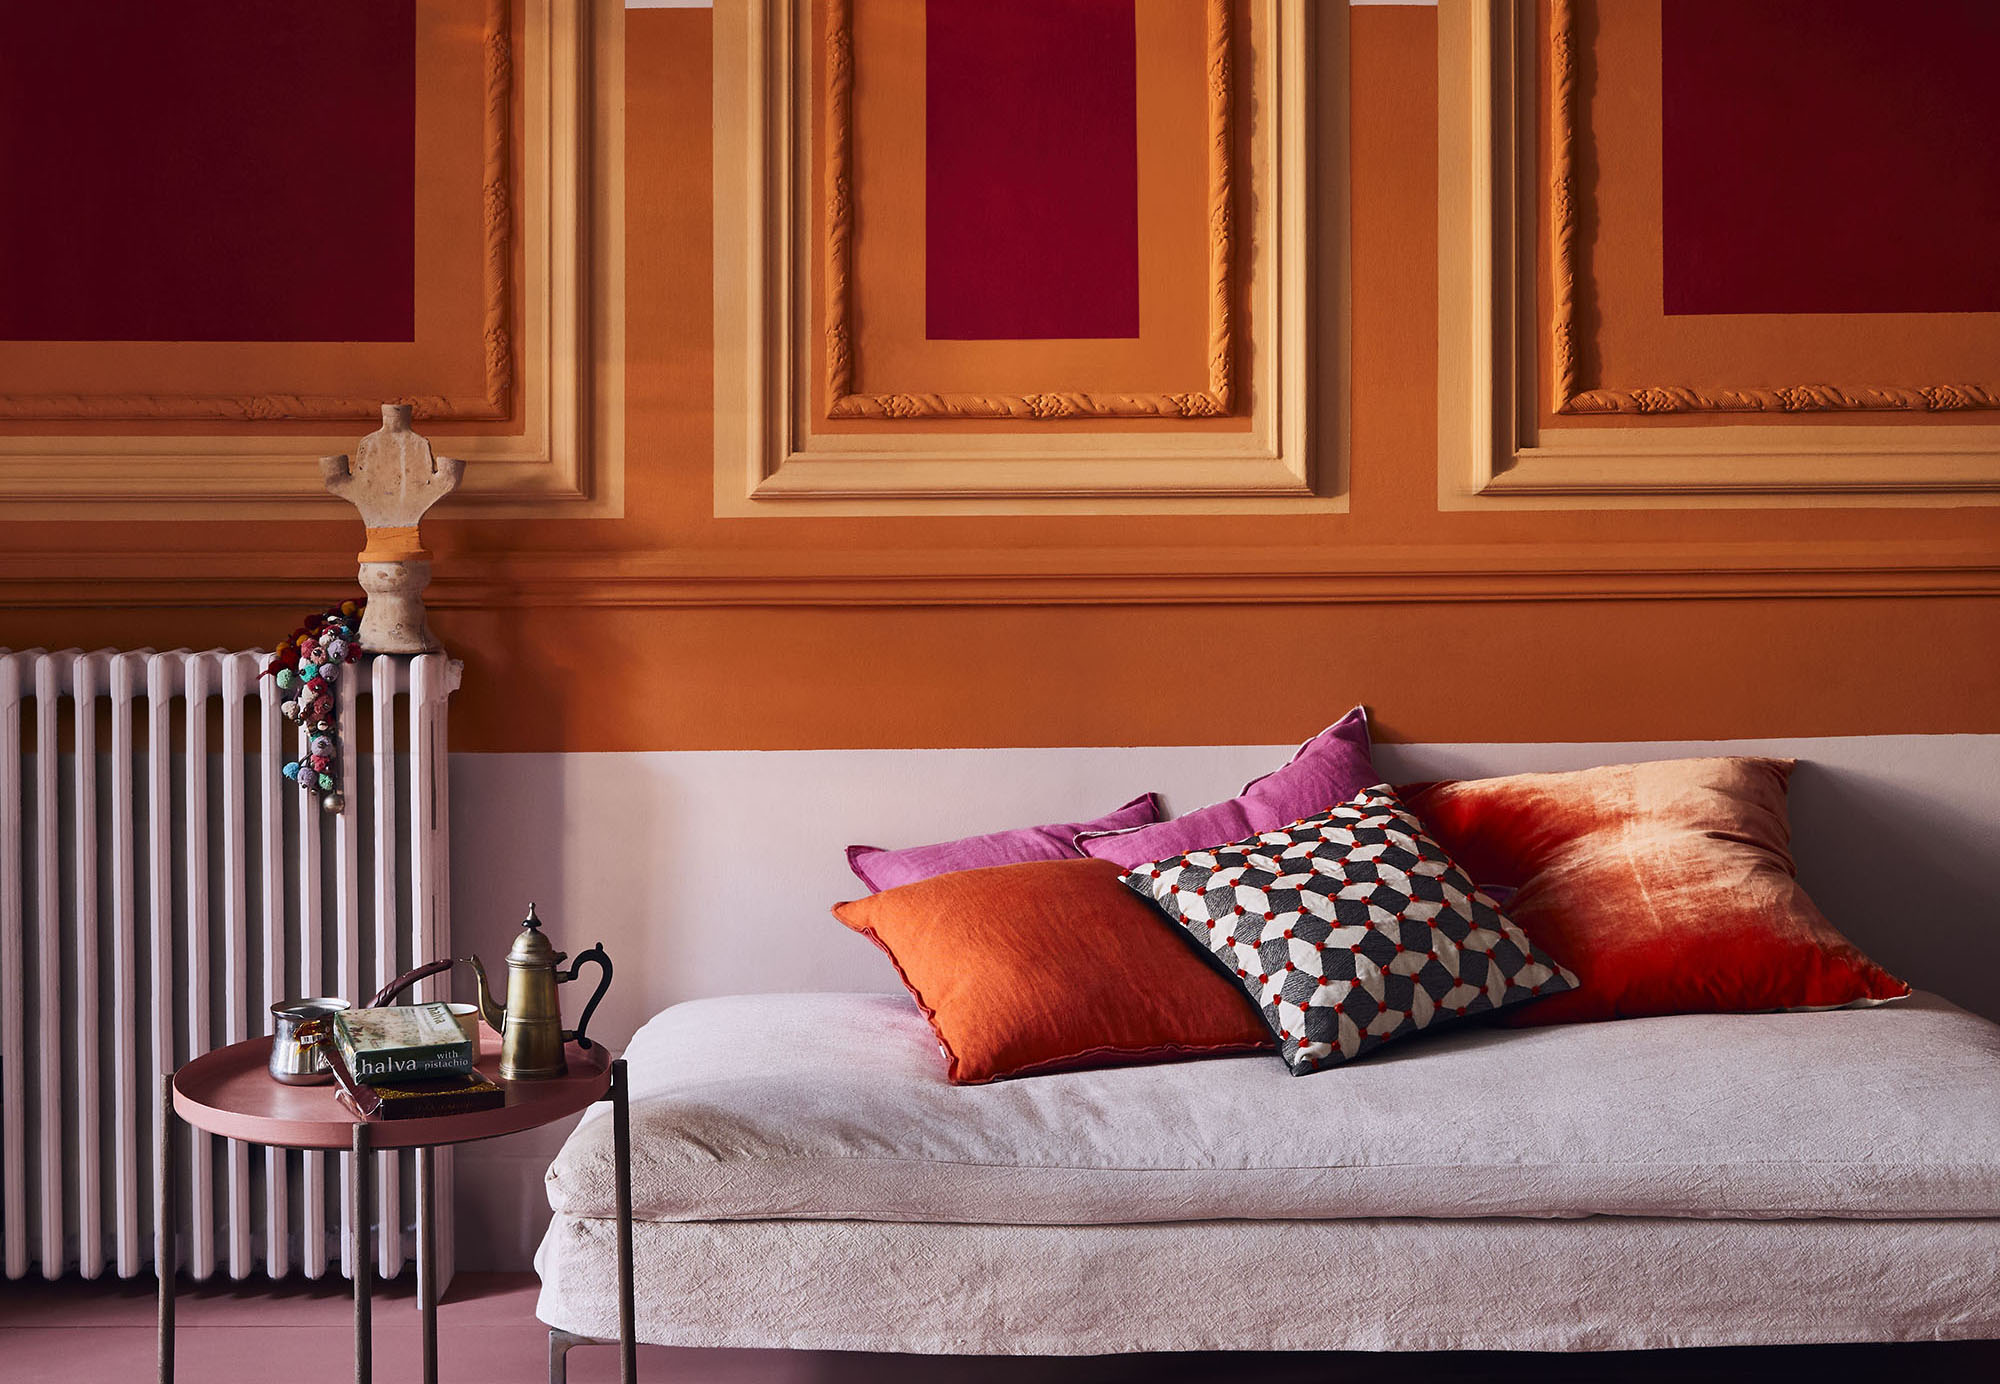 These painted panels add an antique touch to a vibrant living room scheme. Image: Annie Sloan
Refinishing the panels completely is another option if you want to give them a new lease of life, or in cases where you can’t track down a matching wood stain. First, remove the old finish with a mild stripping solution. Next, give the surface a good clean with a gentle detergent and allow it to dry. Finally, apply the new stain/finish.
It’s worth doing your research before this final step to find out exactly what kind of finish would have been used at the time your house was built. Some of the earliest examples of oak panelling were left stained and waxed, whereas from the 18th century onwards they tended to be painted.
Plaster mouldings, cornicing and ceiling rose restoration
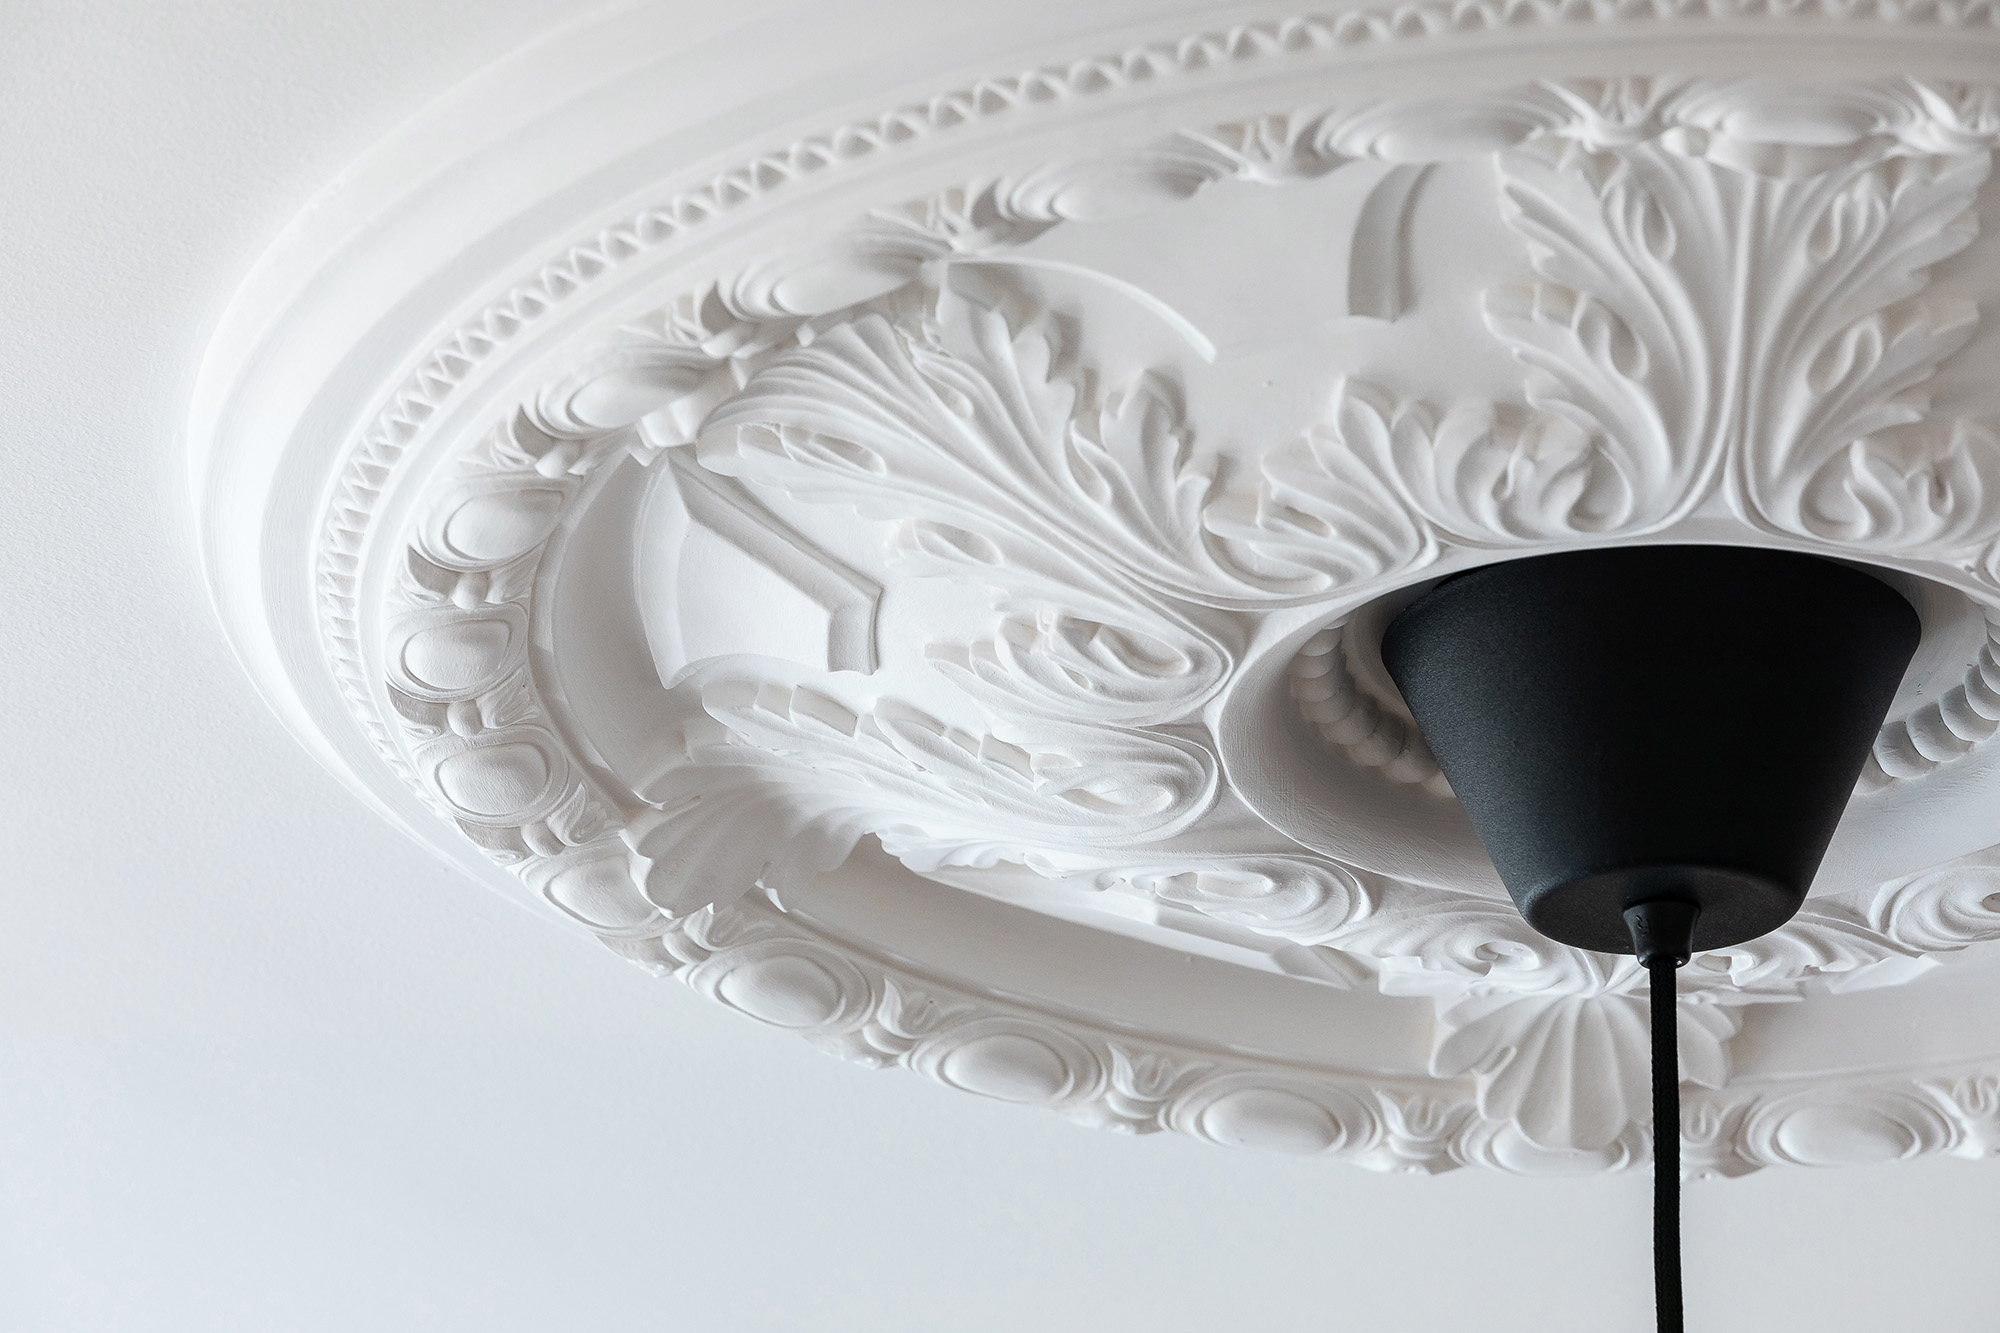 Original details like ceiling roses can add no end of character to a modern living space. Image: Create Bespoke
Typically found in 18th- and 19th-century houses, cornicing and intricate ceiling roses are highly sought-after features. In some cases, all that’s needed is to remove more recent boarding to uncover the original mouldings beneath. If the plasterwork is sound but a little dirty, staining can be removed with a bleach solution – mix one part bleach to four parts warm water.
Another option is to strip old layers of paint away and redecorate yourself. If there are signs of damage or missing sections, consult a specialist who can track down a matching mould or create a bespoke design to fit with what’s already there.
Stone and wood floor restoration
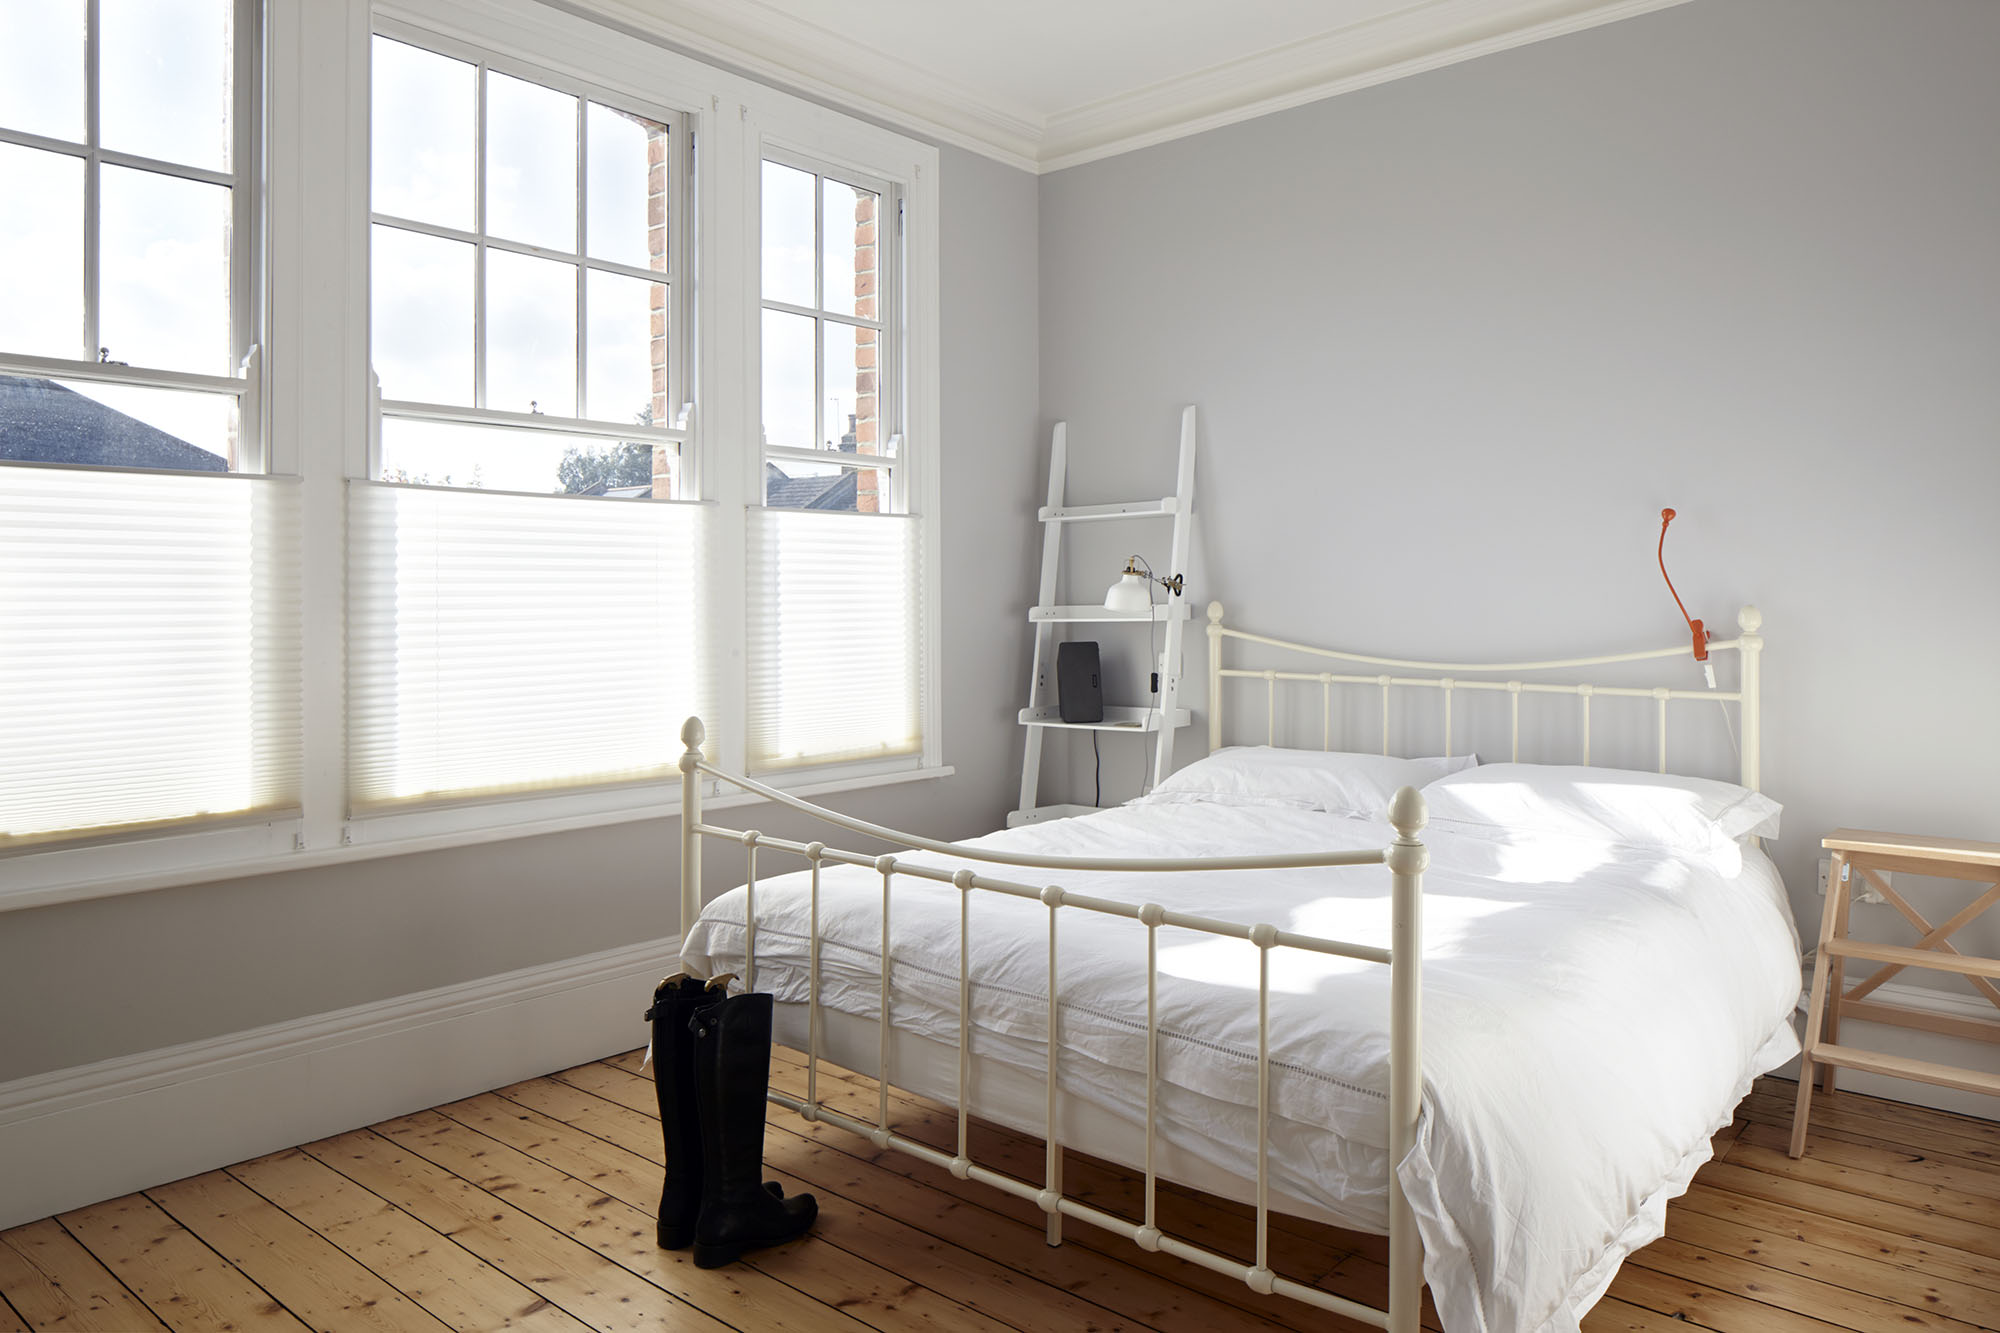 Sanded down to expose the grain, these floorboards make a characterful focal point in this airy bedroom. Image: Clear Architects
It’s possible that vinyl, linoleum or carpets are obscuring original floors in your home. If you discover a stone or brick surface that’s been buried beneath a modern finish, a good clean may be all that’s needed to revive an old floor – but be sure to avoid using any abrasive chemicals. If flooring has been damaged or chipped, track down a specialist who will be able to repoint the surface with lime mortar.
Original wooden floorboards can be restored too. Often, sanding down, oiling or painting old boards will give them a new lease of life. “If it’s an original solid hardwood, you can sand it down for years and years to just take off the top layer every time,” says Create Bespoke's Andy Young. “It’s a case of assessing what the timber is. If it’s a solid hardwood, this is usually a process that can be repeated.”
If there are any signs of thinning, warping or worm-eaten wood, it’s worth consulting a specialist carpenter to carry out repairs. Any attempt to lift the boards yourself could cause more damage, as each one will have been cut and shaped to fill the space individually. Repairs can be carried out in situ by your chosen professional. Reclamation yards are a good place to look for authentic-looking replacement boards.
How to carry out an old staircase restoration
 A curved banister and ornate balustrades are the stars of the show in this sensitive renovation. Image: Cousins and Cousins
An original staircase brings oodles of charm to any period property. Wear and tear is common and can often be overcome by restoring tired, worn woodwork and replacing broken or loose parts.
Many historic staircases were fabricated from separate treads and risers, which makes them straightforward to take apart and remove damaged strips of timber to be repaired. The damaged area of the tread or riser should be cut away and a new piece of specially moulded softwood spliced in. This work should be carried out by a skilled joiner, who may also put timber bearers beneath the freshly spliced areas to give additional support.
“A great option for traditional staircases is to repair or replace the spindles – the vertical bars that join the base rail to the handrail,” says Andy Young. “To match the spindles, the treads and risers can be sanded and either stained or painted ready for a new carpet runner.” Handrails can also be sanded down and refinished to reinvigorate the timber’s surface.
Antique ceramic tile restoration
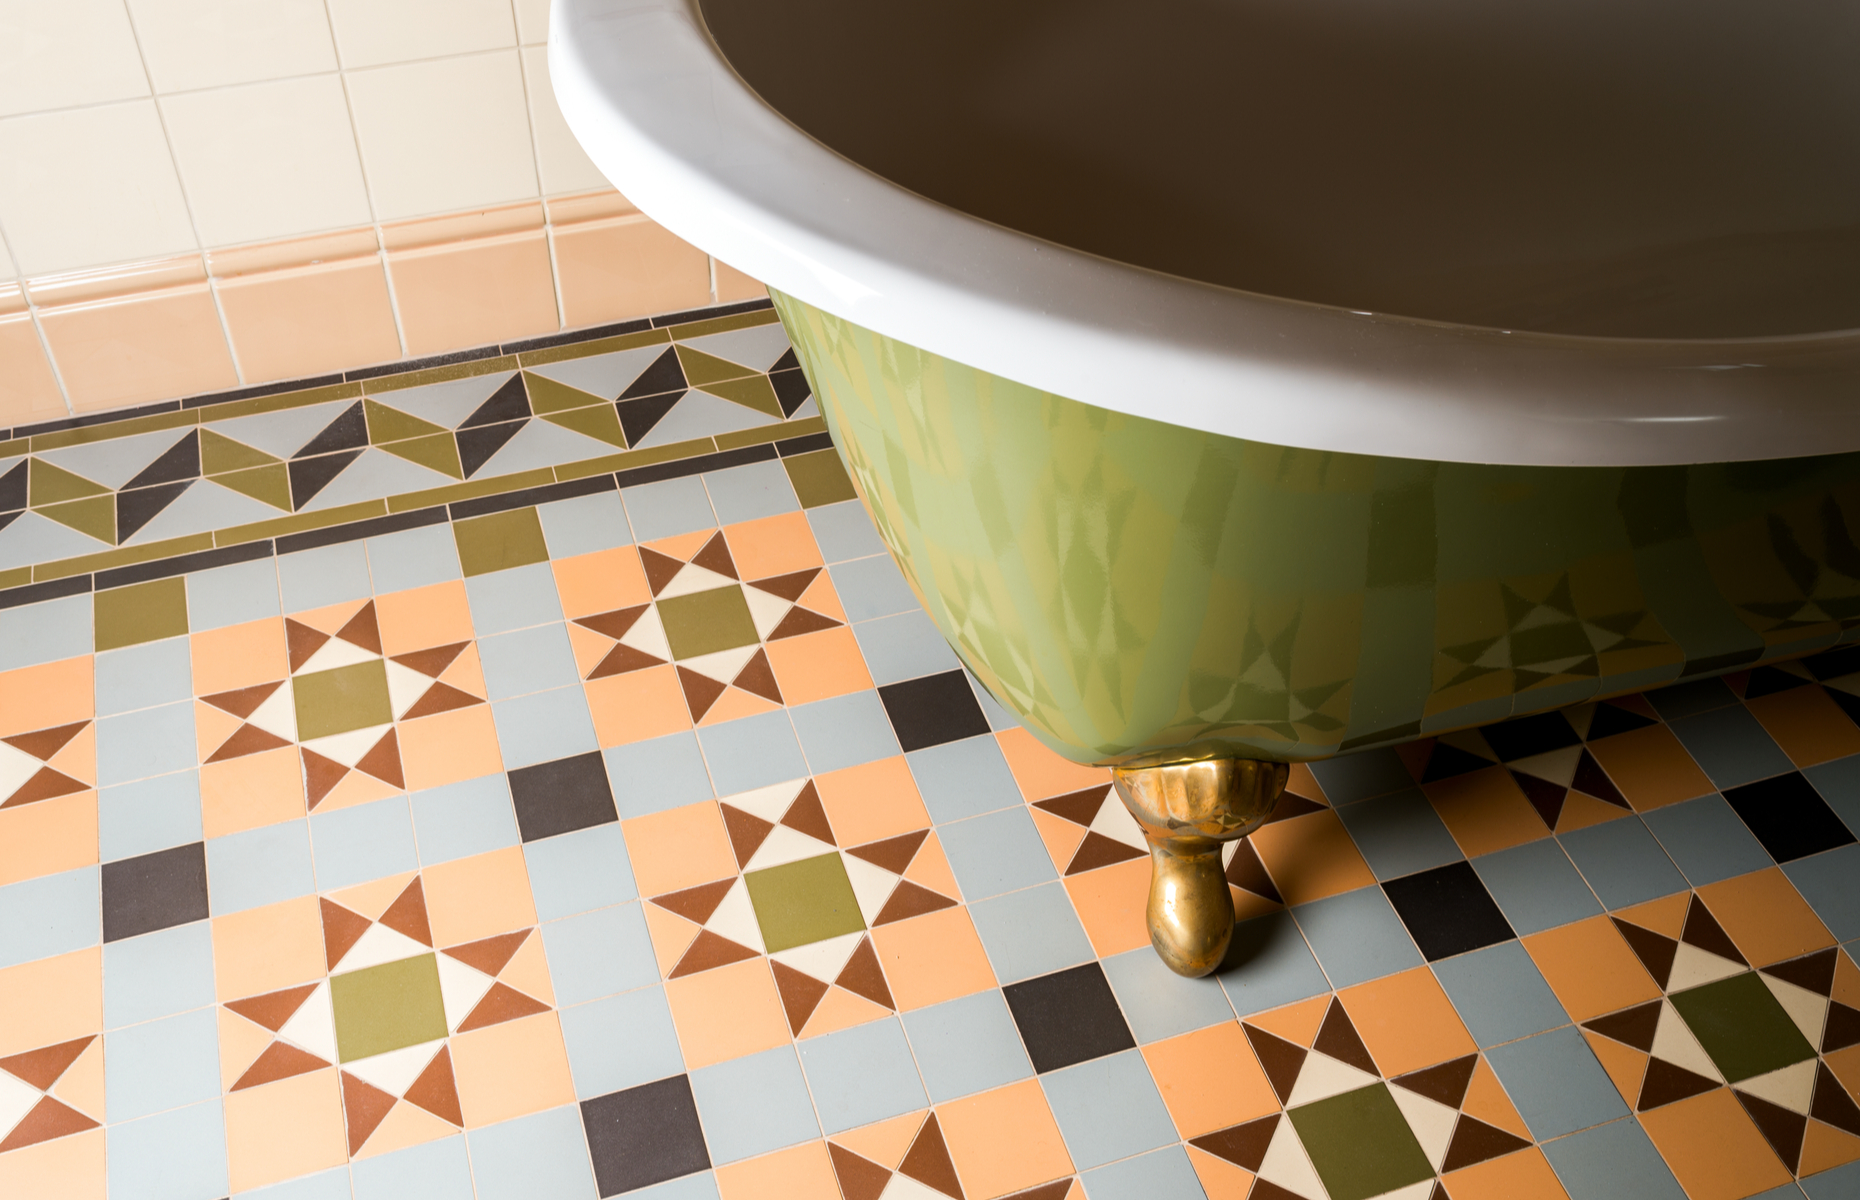 This bathroom wows with a patterned tiled floor, complete with an intricate border. Image: P A / Shutterstock
Statement tiled floors are a common decorative feature in many Victorian homes. If the original encaustic units are still in situ, it’s likely that some will be cracked, broken or in need of replacing.
For units that are in good condition, a careful clean with non-abrasive products will give a new lease of life. If only a few of the tiles have been damaged, it may be that you can track down matching products through specialist suppliers.
For tiles that need to be relaid, it’s worth bringing in a specialist. Victorian houses weren’t built square, so tiles may need to be cut to size to fit the area in which they need to be installed.
Top tips for breathing new life into old tiling:
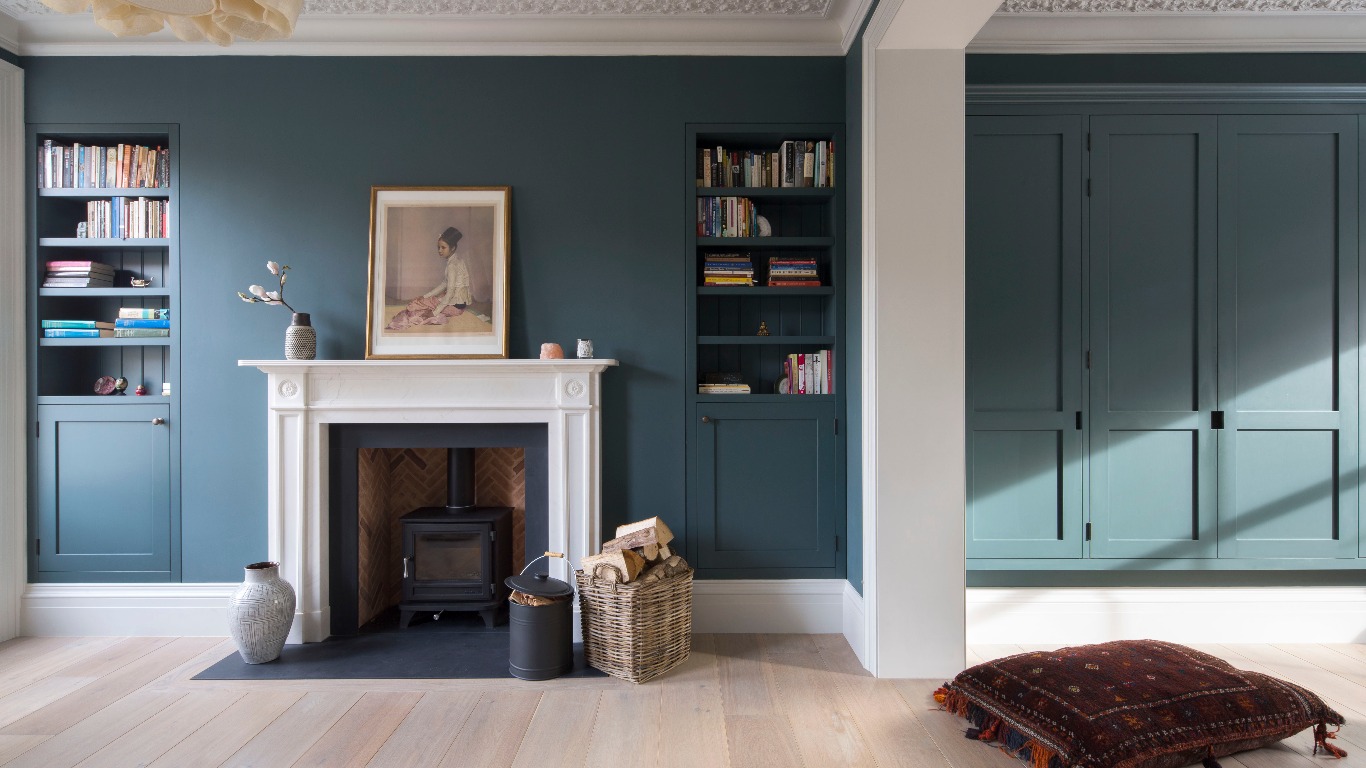
How to restore an old fireplace
Closer investigation of modern fireplaces and boarded up chimney breasts may reveal a historic fireplace hidden just behind the surface, complete with Victorian tiling or iron Art Deco designs. Opening a fireplace that’s been boarded up isn’t beyond the realms of possibility for competent DIYers, however, the integrity of the flue will need to be checked by a registered professional.
“This is important, no matter what your plans for the fireplace and can be completed by most chimney sweep companies,” says Andy Young. “Once that’s complete, the next steps depend on the style of fire; whether it’s an open design, gas fire or traditional log burner.”
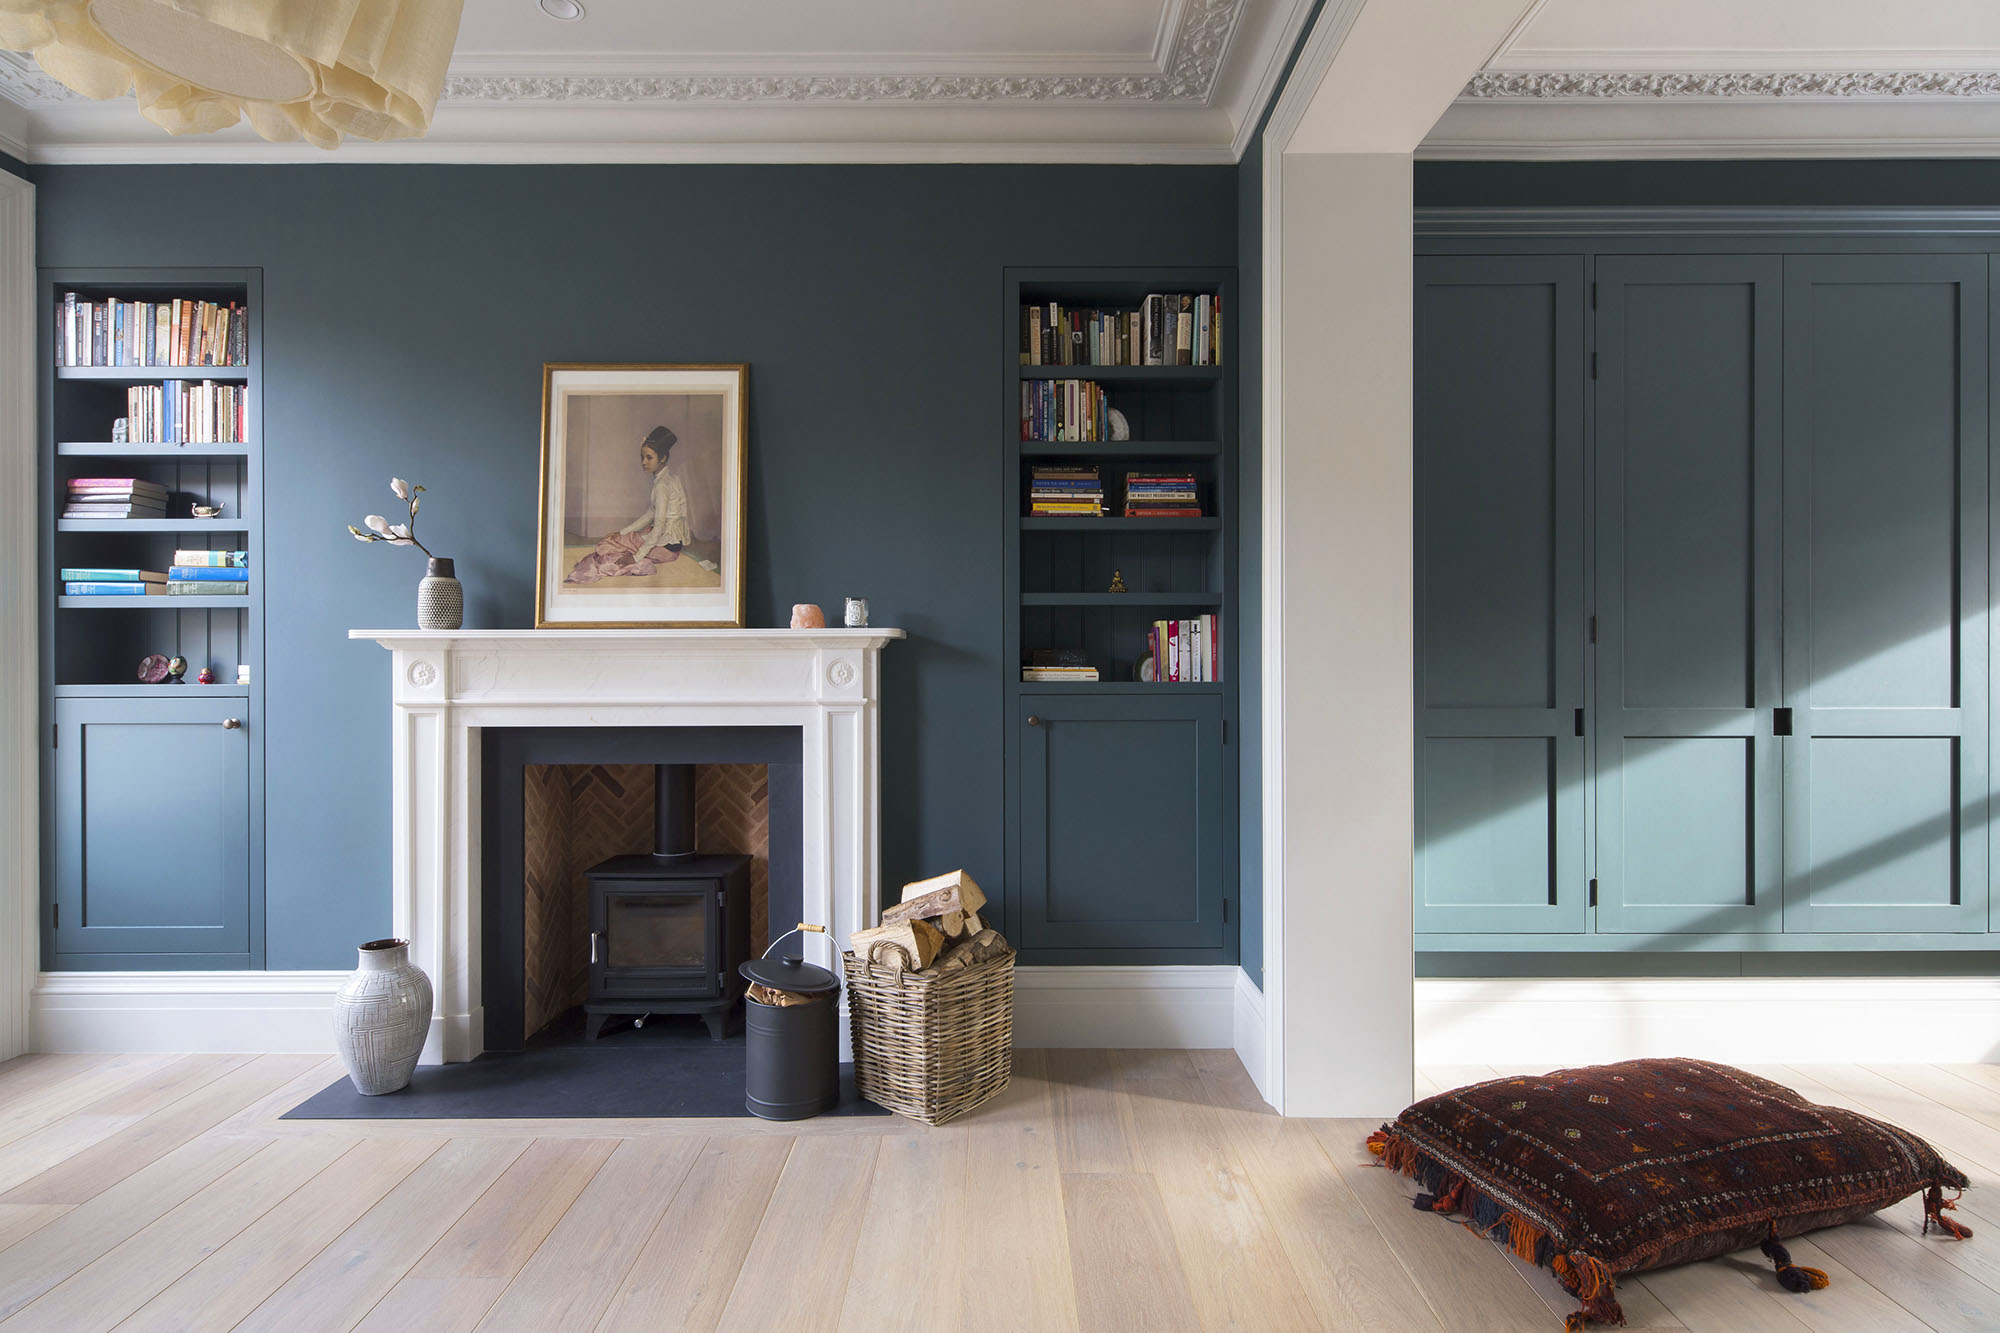 This thoughtful restoration features a charming herringbone brick hearth. Image: Cousins and Cousins
Local reclamation yards or even auctions can be a good place to find authentic replacements, or you could seek out a reproduction from a local or national supplier. If you’re unable to restore the original surround, there are lots of options to recreate the opening with a modern twist.
“You could switch the fireplace surround and mantle with a more modern version, or change the fire inserts and fireplace itself,” says Andy. Remember, if you plan on enlarging the existing opening, you’ll need to call in a professional to check the structural integrity of the chimney stack.
Restoring dado rails and picture rails
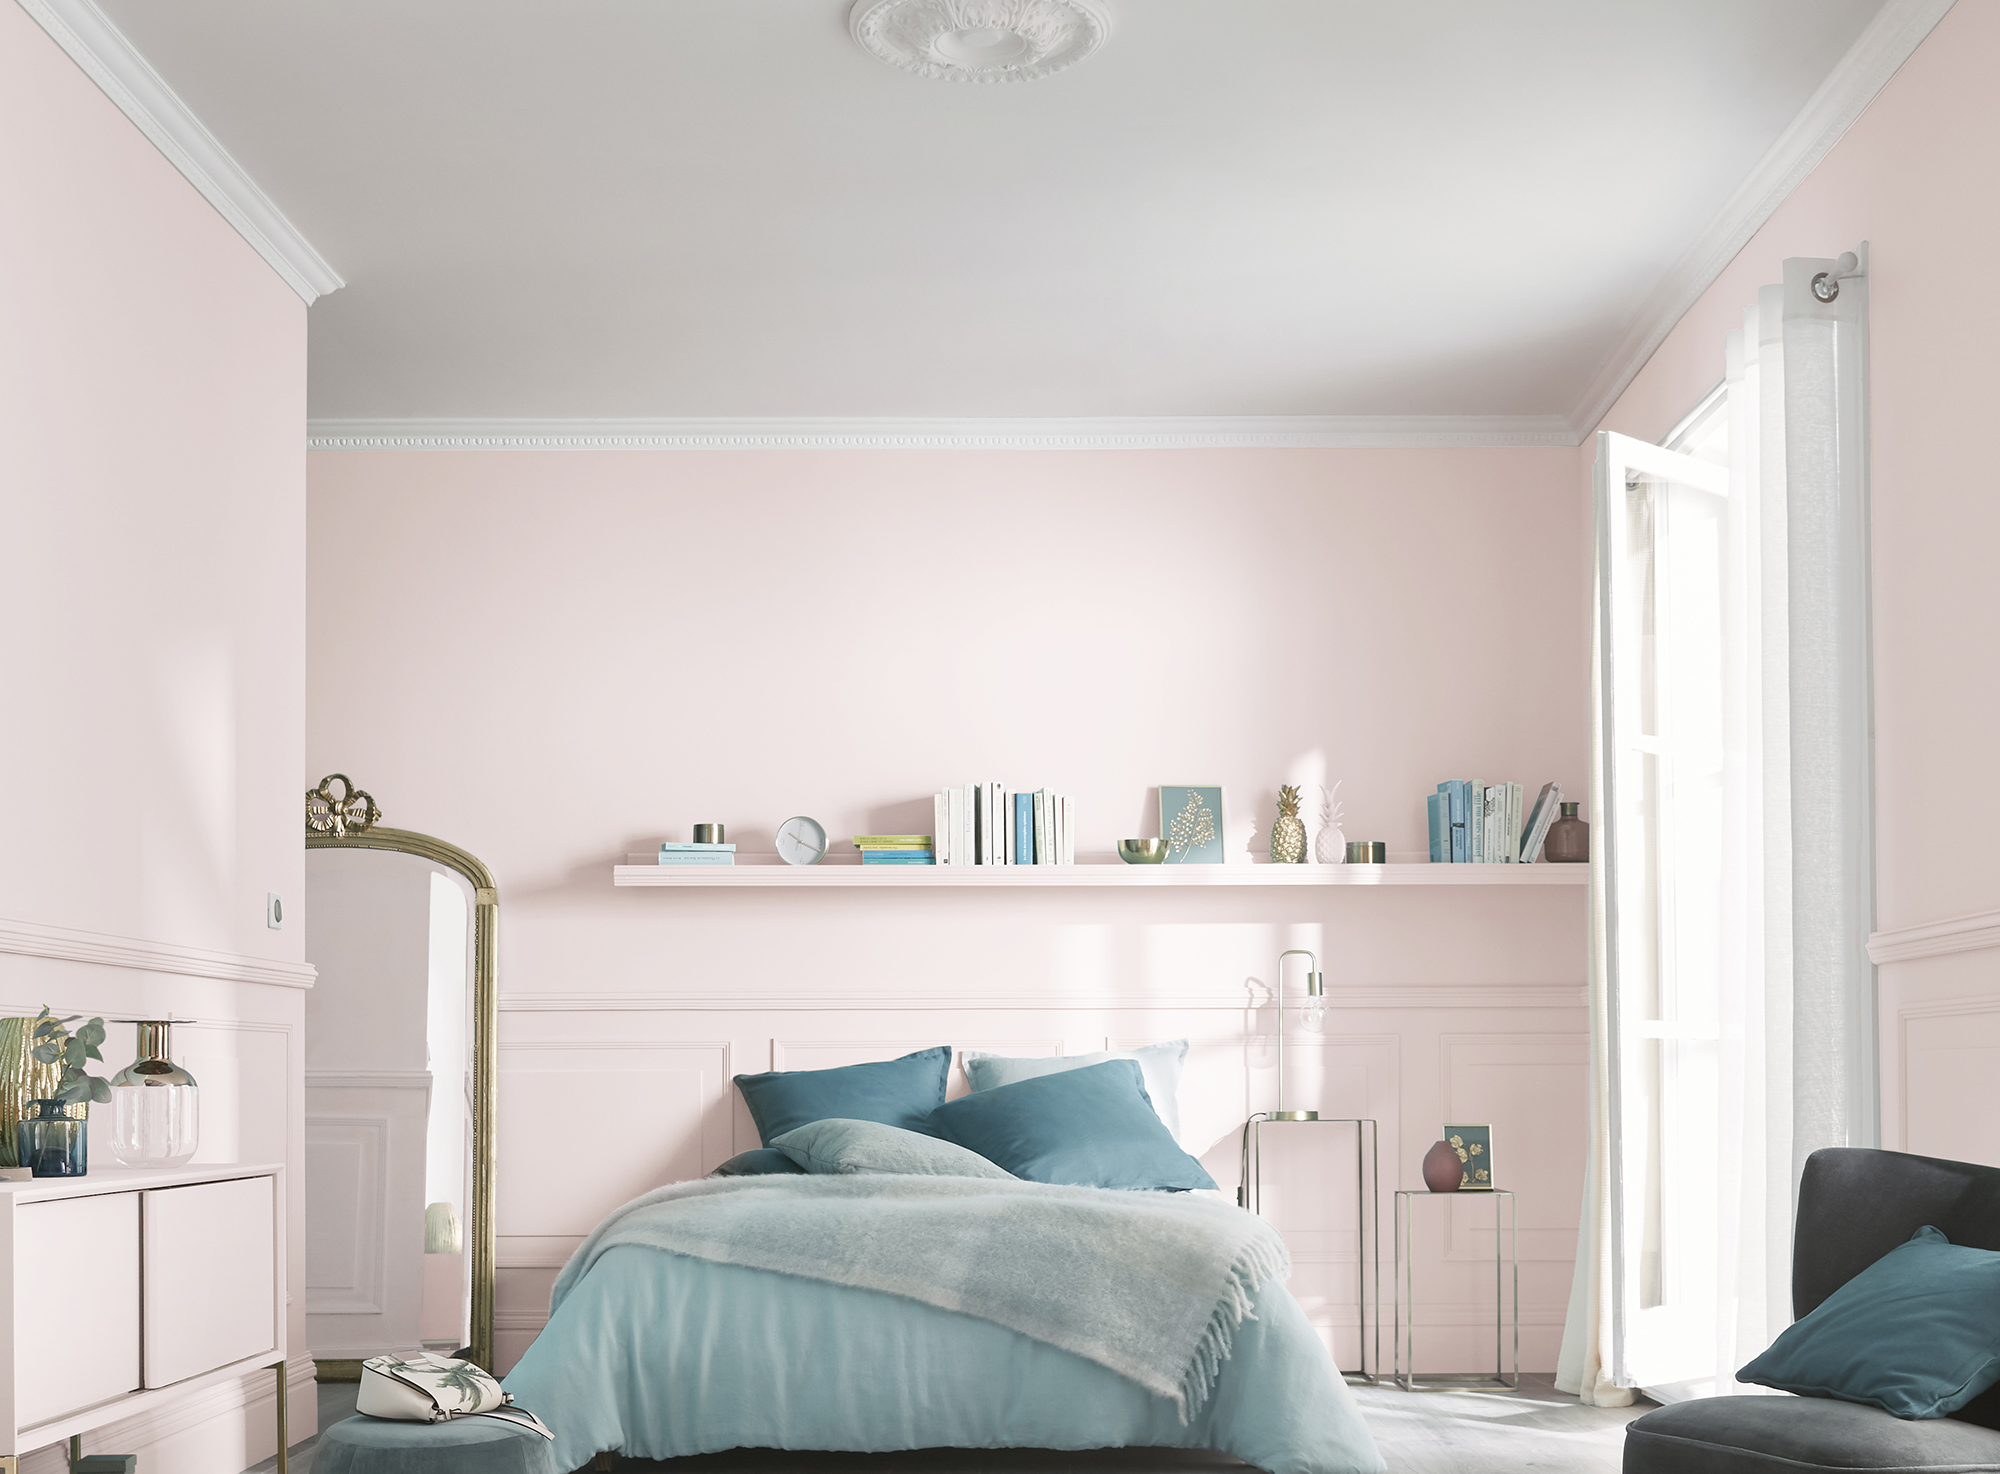 A dado rail and panelling add heritage charm to this modern blush pink bedroom. Image: B&Q
A common decorative feature in Italianate, Arts and Crafts and Victorian homes, dado or picture rails can add lots of character to a home interior. “Restoring dado and picture rails ultimately depends on their condition and whether the cost and effort of stripping them back is outweighed by simply replacing them,” says Andy Young of Create Bespoke. “In many cases, it’s far more work and expense to strip those elements back compared to finding a suitable replacement.”
If you’re tackling the job yourself, start by cleaning the rail off with a damp cloth. Next, use a gentle paint stripper or sand the rail to reveal the wood. At this point, you’ll be able to see if any repairs to the woodwork are required.
Small chips and dents can be ironed out with a suitable filler. If you’re keen to create an authentic wood finish, use an oil-based stain on the surface of the rail. If you’re planning to repaint the rail, use a primer first.
“Remember, if the rails are plastered to the wall, removing them could ultimately damage or affect the plasterwork,” says Andy. In these cases, repairing is preferable to replacing the picture rail.
Restoring and repointing brickwork
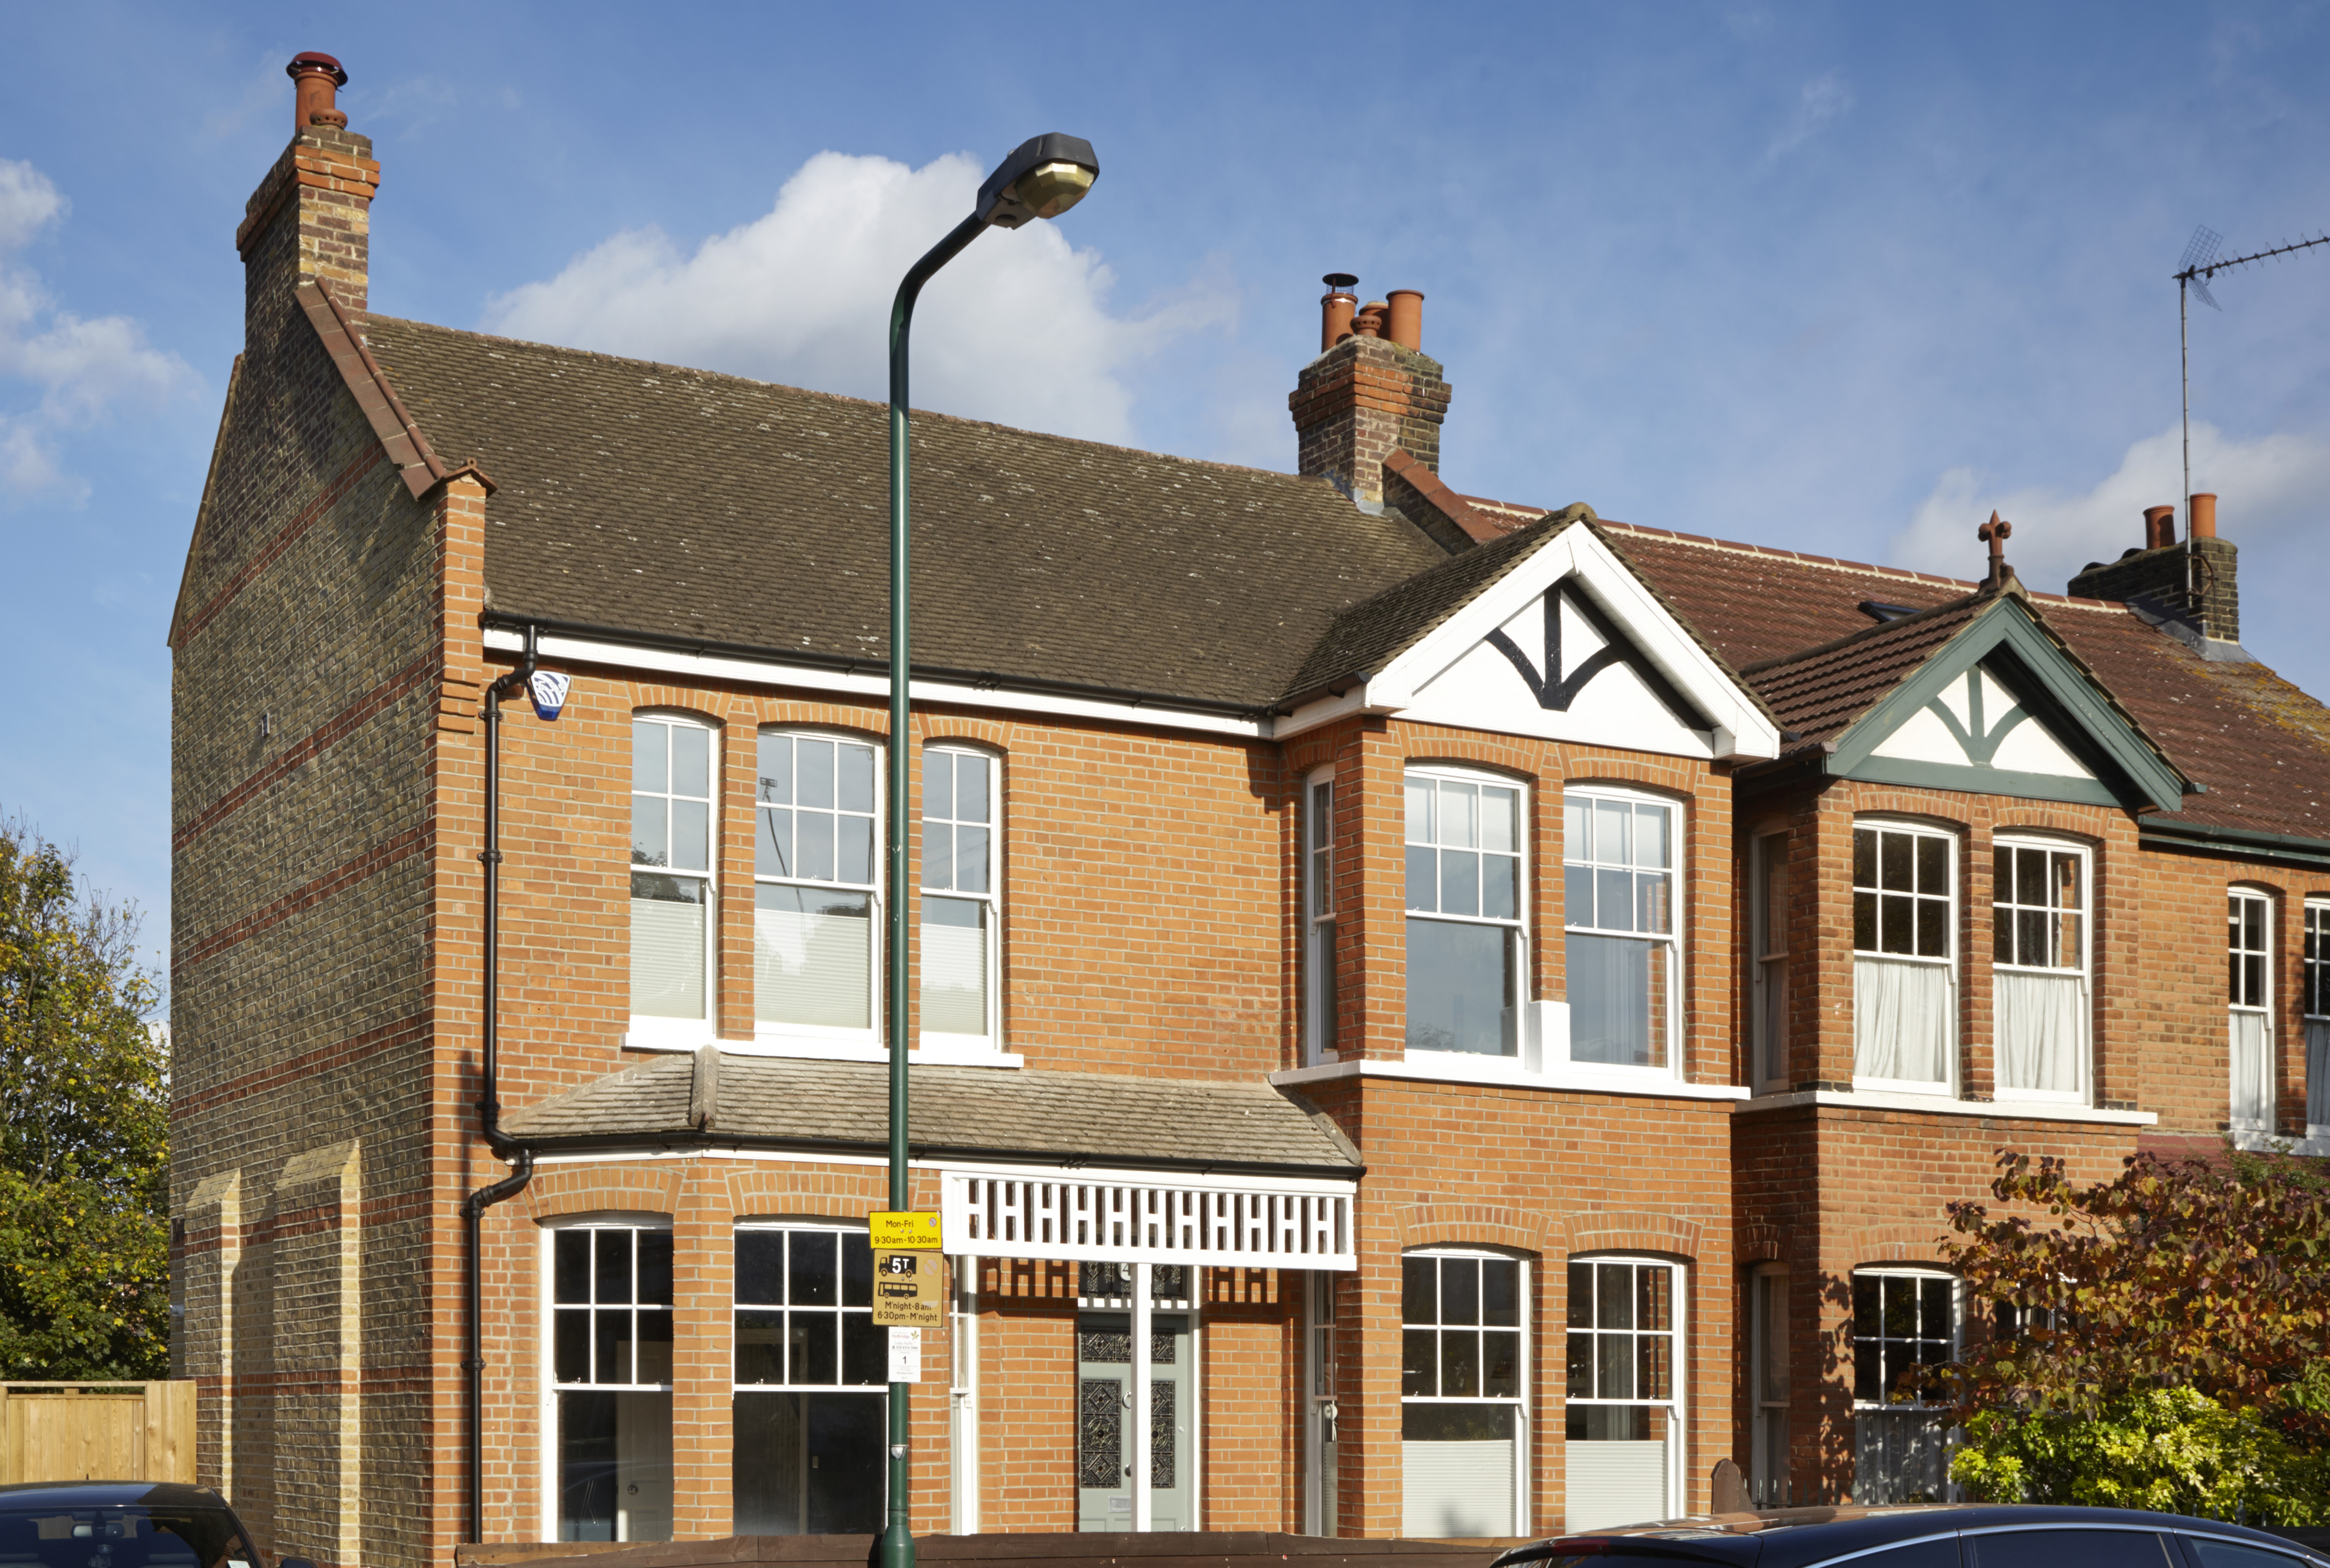 Repointing brickwork can completely transform the facade of a period home. Image: Clear Architects
For many Victorian, Georgian and Italianate homes, a handsome brick façade is an integral part of the property’s character. Common issues to look out for include crumbling (spalling) bricks, pointing that is loose or cracked, water spilling onto brickwork from failing rainwater conduits and internal and external damp patches.
For spalling bricks, consult a professional bricklayer who has experience working with period properties. You can cut out and replace damaged bricks, switching old units with reclaimed versions sourced from specialist brick suppliers or reclamation yards. Another option is to make the face of the damaged brick up with a tinted lime mortar.
A wall with soft mortar pointing will need some TLC once the mortar has eroded beyond the face of the brick units – you’ll be able to see water settling on the exposed top ledge of the bricks, which allows moisture to penetrate into the structure.
An experienced bricklayer will gouge out old pointing by hand to a depth of 10mm. An appropriate lime mortar that has been matched to the original pointing can then be pressed into the joints. According to MyBuilder, the average cost for repointing in the UK is £25 per m².
READ MORE: How to renovate an old house – a beginner’s guide to fixer-uppers
Comments
Be the first to comment
Do you want to comment on this article? You need to be signed in for this feature