This man spent 4,000 hours transforming an ancient abandoned house in Spain
Discover how this 200-year-old home was given a second chance

In 2019, van converter, climbing enthusiast and YouTuber Nate Murphy, thrilled his followers when he announced he was buying a 200-year-old abandoned house in Catalonia, Spain, intending to renovate it.
From replacing the roof to installing glazing, rewiring and even welding steel, Nate spent around 4,000 hours and €65,000 (£54.8k/$74.2k) transforming the dilapidated dwelling into a gorgeous home.
Click or scroll to take a tour and discover the full story…
Spotting an opportunity
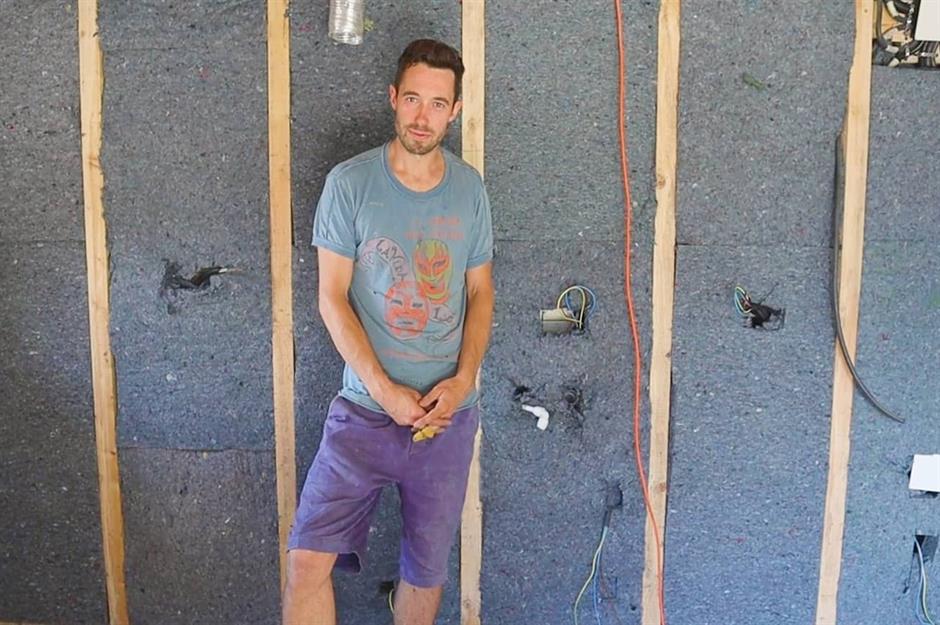
So, where did it all begin for Nate? Well, he's the founder of The Van Conversion Guide and has been converting vans into awesome homes for more than a decade. After living in a van for four years, moving from place to place, he decided to take on his biggest project to date – he wanted to renovate a house.
In 2018, while visiting Romanins near Oliana in Catalonia with his girlfriend, Dei, Nate spotted an abandoned house and thought it would make for the perfect base. “We didn’t know if it was for sale,” Nate says. “According to locals, it was, but we had no way of contacting the owner. It was a case of trying to track him down.”
Bags of potential
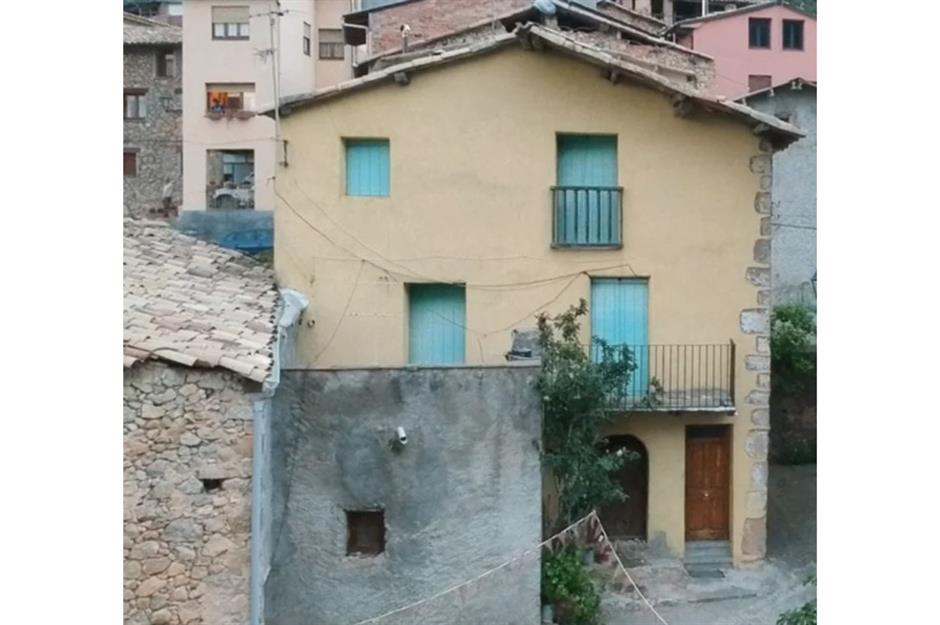
One day, while olive picking in the area, Nate was told the owner was at the house. He quickly headed over and managed to get a tour. “It needed a massive amount of work," he says. "We knew we would have to pretty much rip everything out, but it offered fantastic potential."
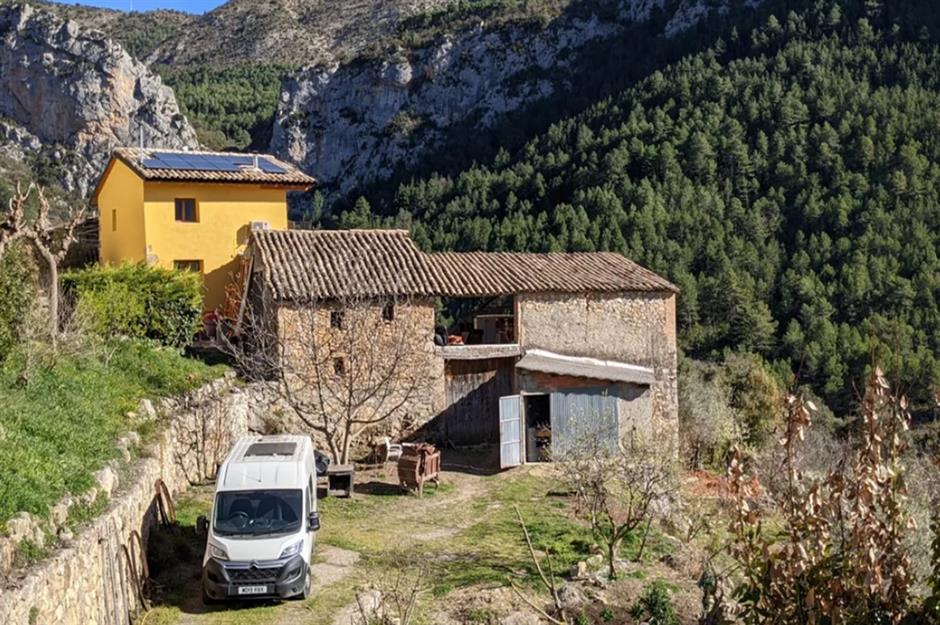
The owner originally wanted €100,000 (£84.3k/$114k), but knowing how much work was required, Nate offered him €80,000 (£67.4k/$91.3k) and he accepted. With taxes, it came in at around €90,000 (£75.9k/$103k). This image shows the exterior of the house before the renovation.
Abandoned wreck
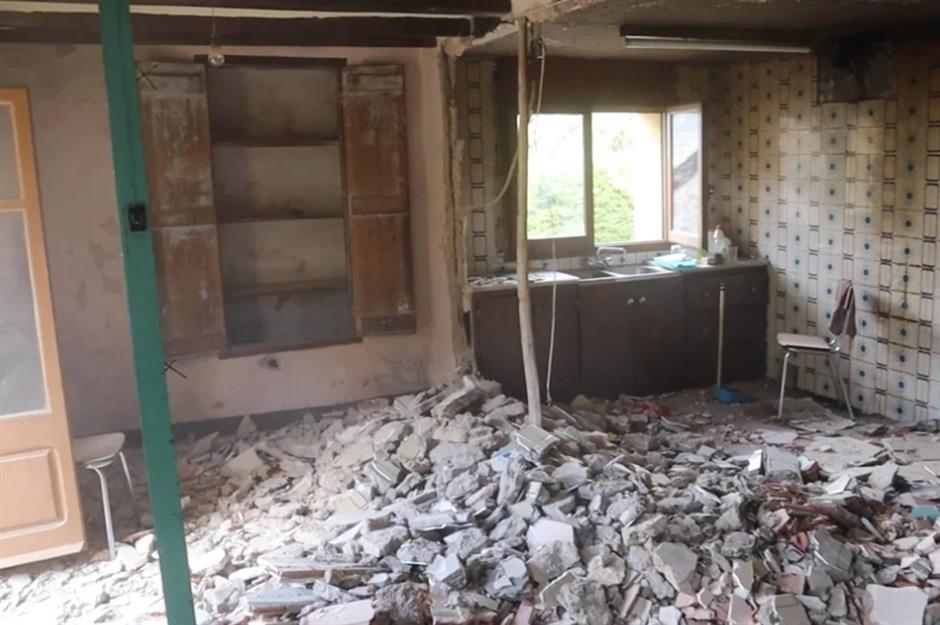
Nestled in a tranquil hillside village, in a valley in the Pyrenees mountains, the property featured three floors, as well as a derelict basement and an attached barn. "A plaque on the front door says it's 220 years old, but we don't know exactly when the plaque was installed," Nate says. "It hadn't been lived in for over 20 years and was full of junk."
So the first job was to clear the interior out. "I filled three large skips, around 10 to 12 tonnes each, with rubble, cement, plasterboard and other materials." This image shows the state of the interior when Nate first got the keys.
Prepping and planning
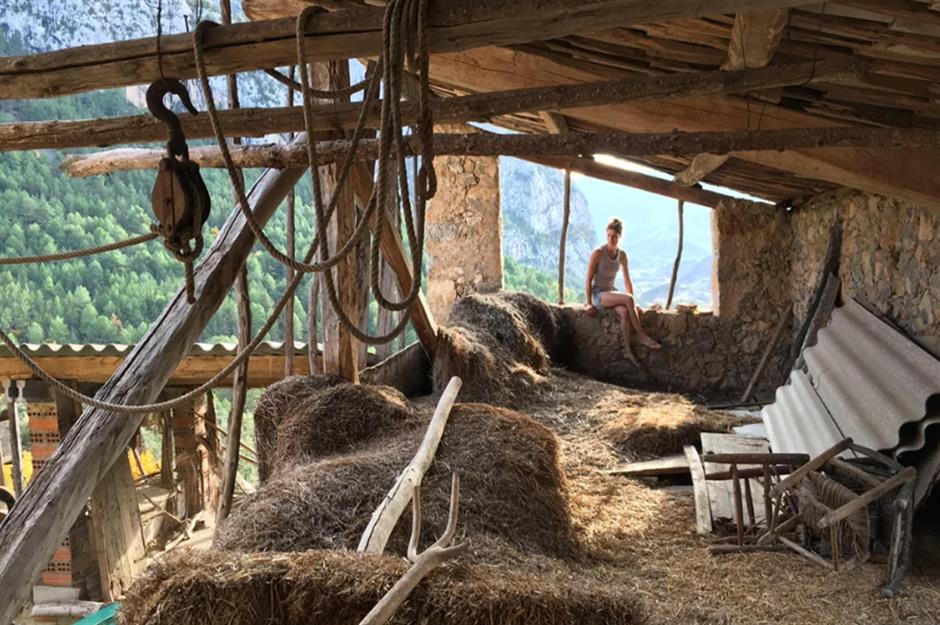
It took Nate and Dei six weeks to empty and clean the interior. They removed old furniture, hundreds of jam jars, mountains of hay from the barn (pictured), dead rodents and even a large metal bin filled with oil.
"It wasn't so bad," Nate says. "It was hard work, but hard work is good for you." The couple recycled what they could, taking anything that couldn't be reused or recycled to the local tip.
High explosives
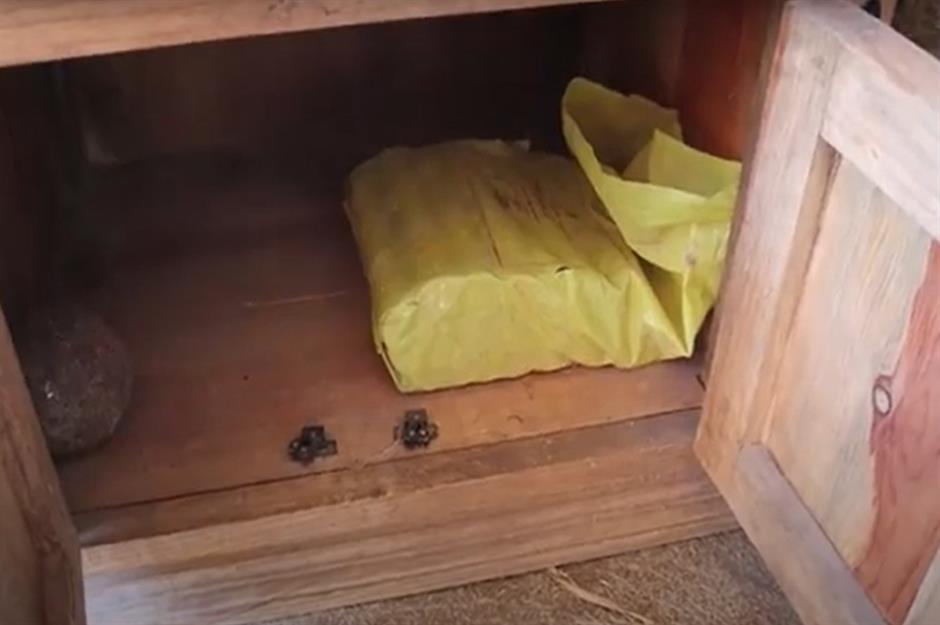
Shockingly, while clearing out the old barn, Nate stumbled upon a wooden storage unit. Inside was a 4.4lb (2kg) bag of high explosives. "It had sat there in the old hay for god knows how many summers and winters," Nate says. "One stick could have destroyed the house, and we had about 20 of them."
Nate called the police, and a bomb disposal team arrived to safely remove the explosives.
Getting stuck in
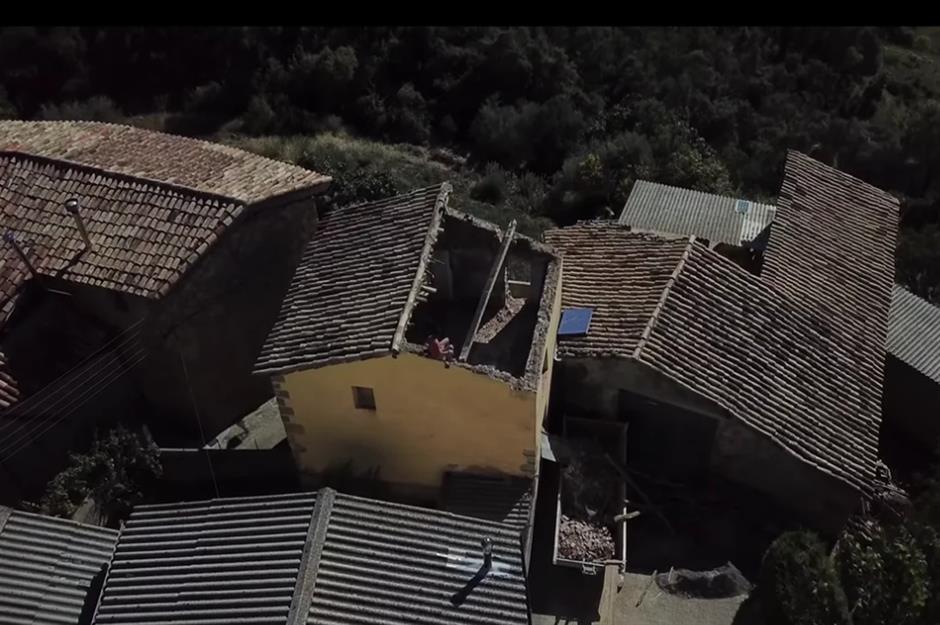
The couple then met Nina, a local architect, who helped them draw up the property plans and submit them to the local authorities for consent. Nate wanted to install sliding glass doors in the living room on the first floor and in the master bedroom, so planning permission was essential.
Nate and Dei took a break while approval was arranged, then four months of major structural work commenced. "We replaced the roof, removed internal walls, created openings for new windows and laid new floors," Nate says. One of the biggest jobs was the roof, which had a hole in it. The entire structure had to be dismantled and rebuilt.
Stripped back
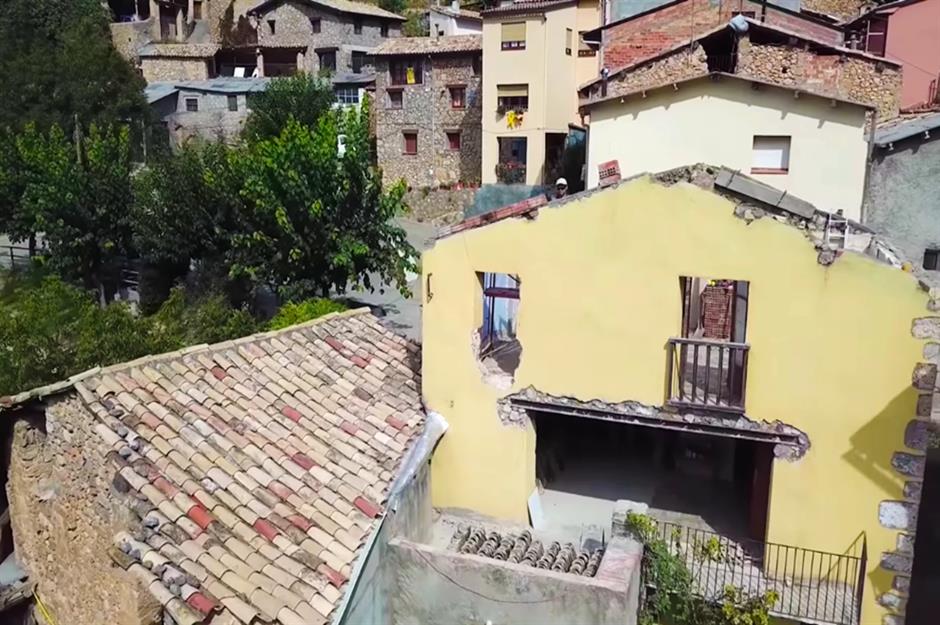
This image shows how Nate painstakingly disassembled the building. He removed the roof's tiles one by one, keeping them to one side to be reused later.
The wooden trusses, joists and beams originally holding up the roof were removed, and even parts of the exterior walls were dismantled. Here, you can also see the new opening that Nate created – a large one on the first floor, where the sliding glass door would go, connecting the open-plan living space to an exterior balcony.
The rebuild
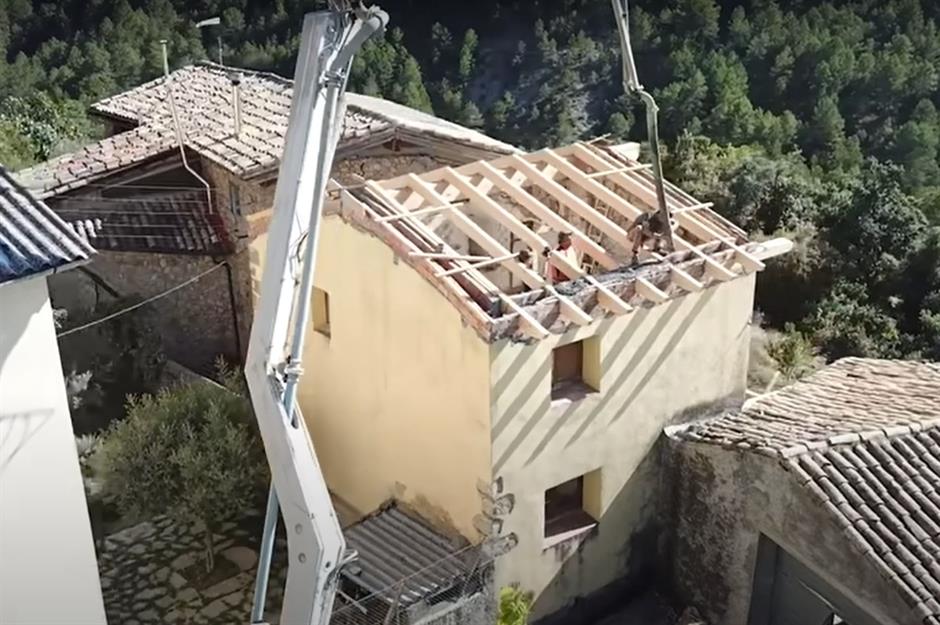
Amazingly, Nate tackled the roof solo, with a friend helping where possible. They measured and cut new timber beams to form the structure and then built up the exterior walls to meet the roof, using bricks and cement. This large machine features a nozzle that Nate could move and position before filling any gaps with cement.
Once the beams were in place, an ondalina frame was laid over the top, as well as a layer of insulation, before the old tiles were relaid. "It was important for me to keep the style of the original roof," Nate explains. "But we didn't quite have enough tiles. Luckily, we managed to get about 150 more from a neighbour, who happened to have some spares."
Hiring reinforcements
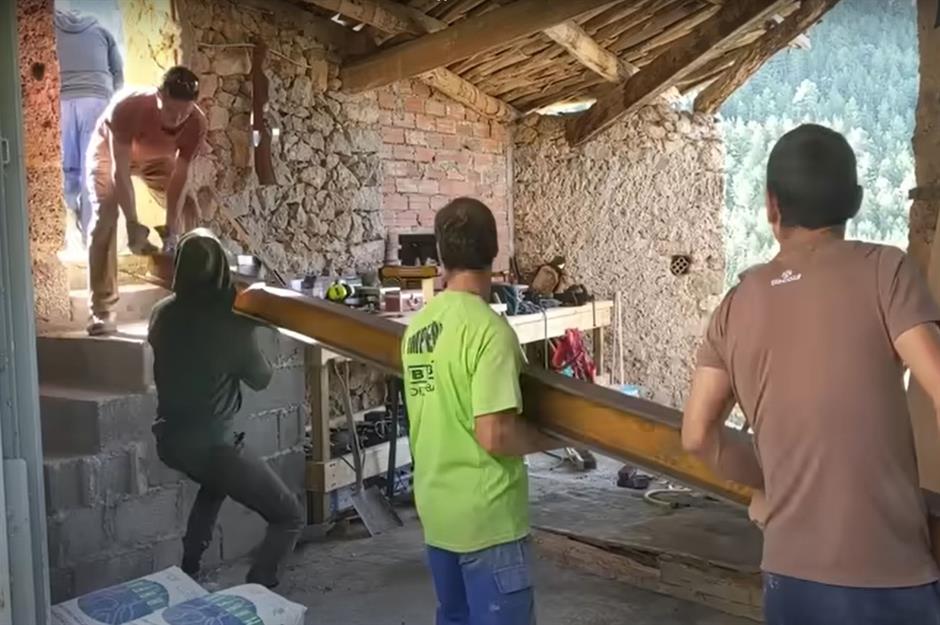
Keen to install new, energy-efficient windows, Nate removed all the original windows and their surrounds before installing new timber framing for structural stability. Any gaps between the frames and brickwork were filled with cement to ensure air and water tightness. For the large opening in the living room, Nate took a sledgehammer to the exterior wall.
"There are some things you’re not allowed to do yourself," he says. "One was the sliding doors. I prepped the spaces, and then professional builders came in for the day and helped install the structural beams, which needed four people to lift them. If that went wrong, the whole front of the house would fall down, so this was important."
Let there be light
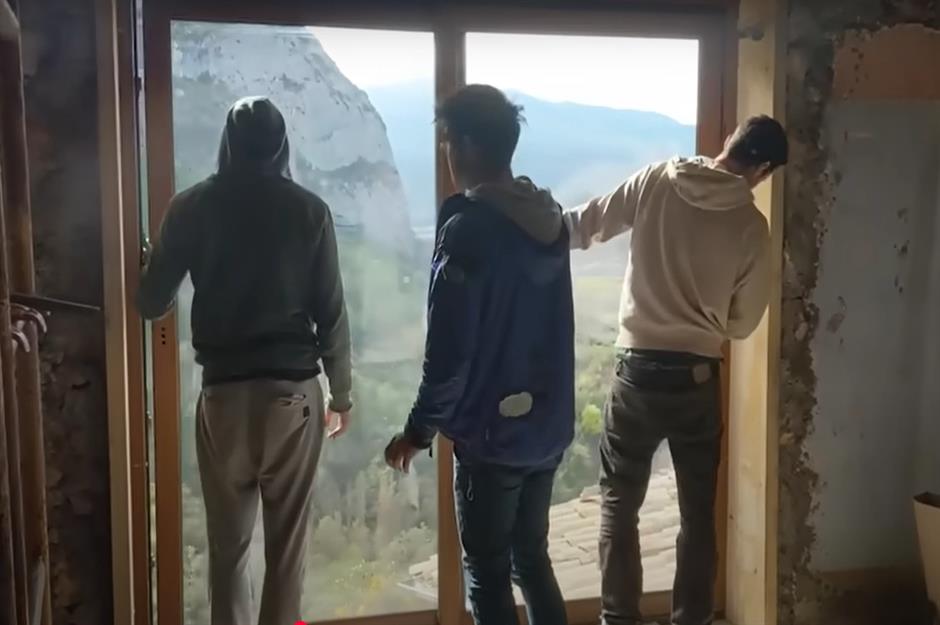
Once the support lintels were in place, the sliding glass doors were installed. They instantly transformed the main interior living room and bedroom.
Opening to a balcony, which Nate finished with balustrades that he handmade by cutting the steel to size and welding the different elements together, the glass doors have traditional wooden frames, like the former windows. "The sliding doors probably cost about €4,000 (£3.4k/$4.6k), but they made a huge impact on the overall look and finish of the house," Nate confirms.
Removing barriers
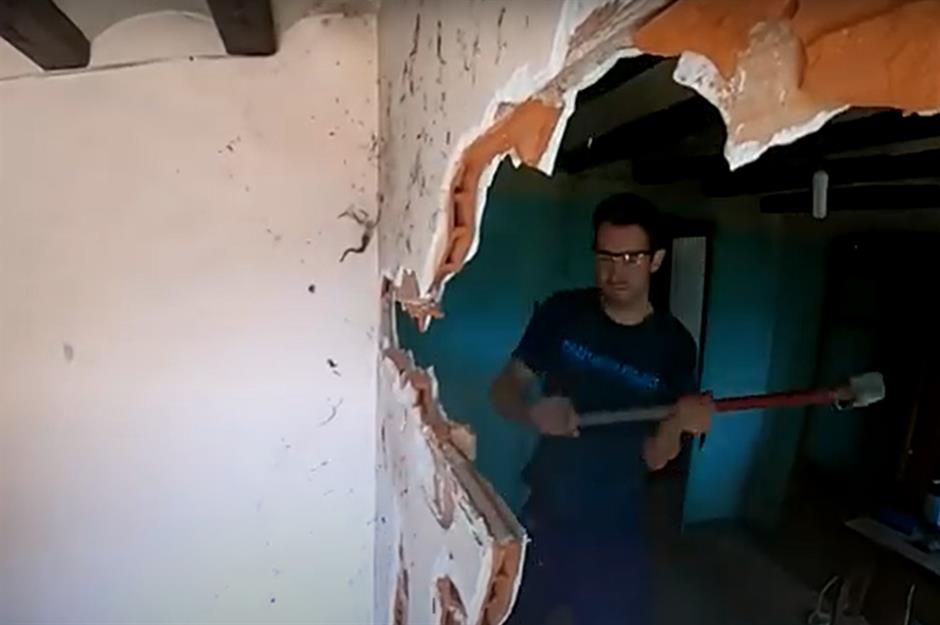
Once the new windows and roof were in place, Nate could really focus on the interior, which featured small and dark rooms. So, he removed as many of the non-loadbearing walls as possible, opening up the main living space to create room for a lounge, dining area and kitchen.
Here, Nate can be seen knocking down the old plasterboard walls with a sledgehammer – a dusty and laborious task.
Laying the floors
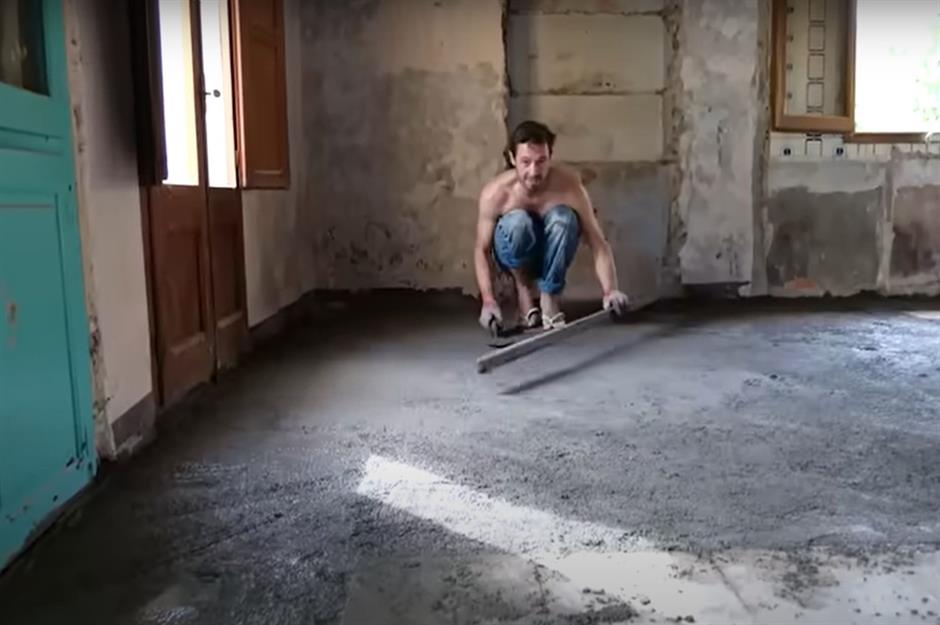
Nate also had to work on the floor in the main living room. A previous owner had installed some internal walls and then poured concrete onto the floors, so once these makeshift partitions were removed, it was clear the floor wasn't level. "Because I wanted to lay wood flooring in the room, the floor really needed to be flat," Nate says.
"I sourced materials locally, where possible, but had some things shipped over from the UK, as they were either better value or better spec. This included the wood flooring, which isn't really a thing in Spain."
Rescuing the beams
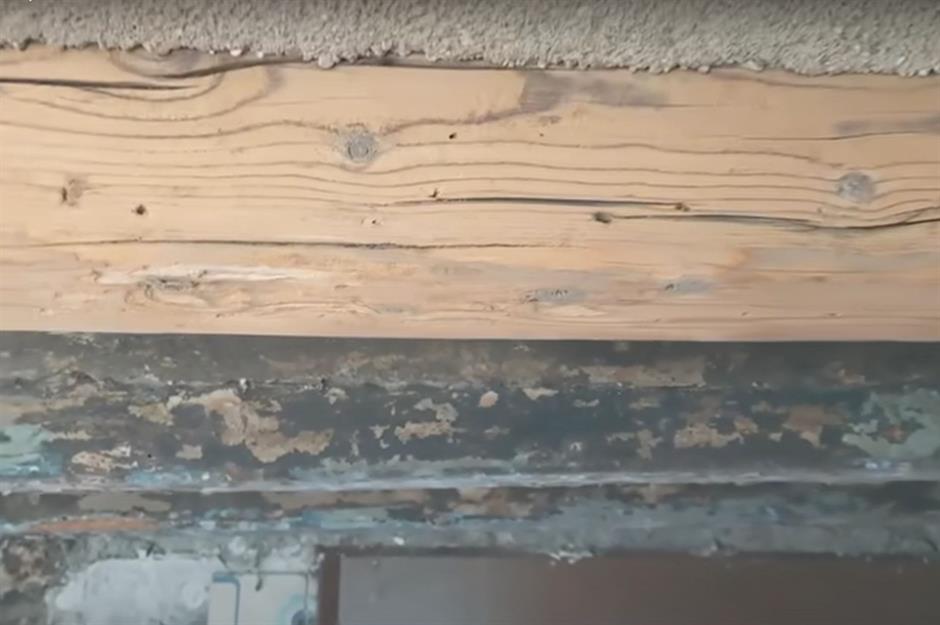
While Nate tackled almost all the jobs himself, there was one he's glad he didn't do. "I initially wanted to hire a machine to sandblast the ceiling beams, to take off the black stain and varnish that was covering them," explains Nate. "I found out it wasn't possible, so we hired a guy. It’s a really horrible job. He had to wear a hood and goggles to protect himself. I wouldn’t have wanted to do that."
This image shows how the beams looked before and after being sandblasted. The professionals Nate hired also cleaned up the concrete ceiling in the open-plan living area.
Creating spaces
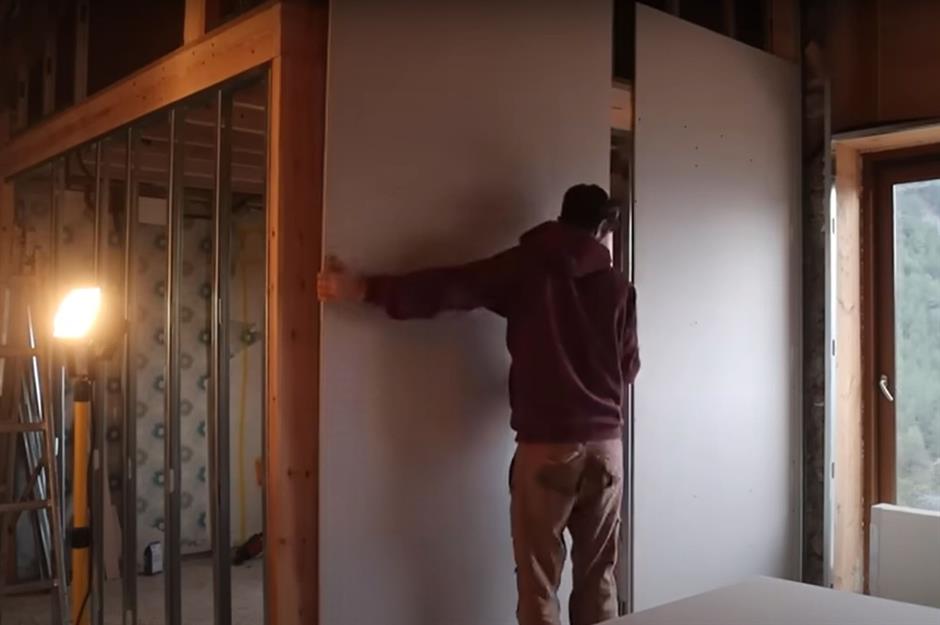
Once the floors were ready, Nate could install his new stud walls to section off the interior into different spaces. He cut timber framing to size, installed it, and then added insulation between two sheets of plasterboard.
Dei then helped him cover the interior walls with fresh plaster, ready to be painted. For the wiring needed for light switches and power sockets, Nate created a plan on paper, then marked out their positions using spray paint.
Building the bathrooms
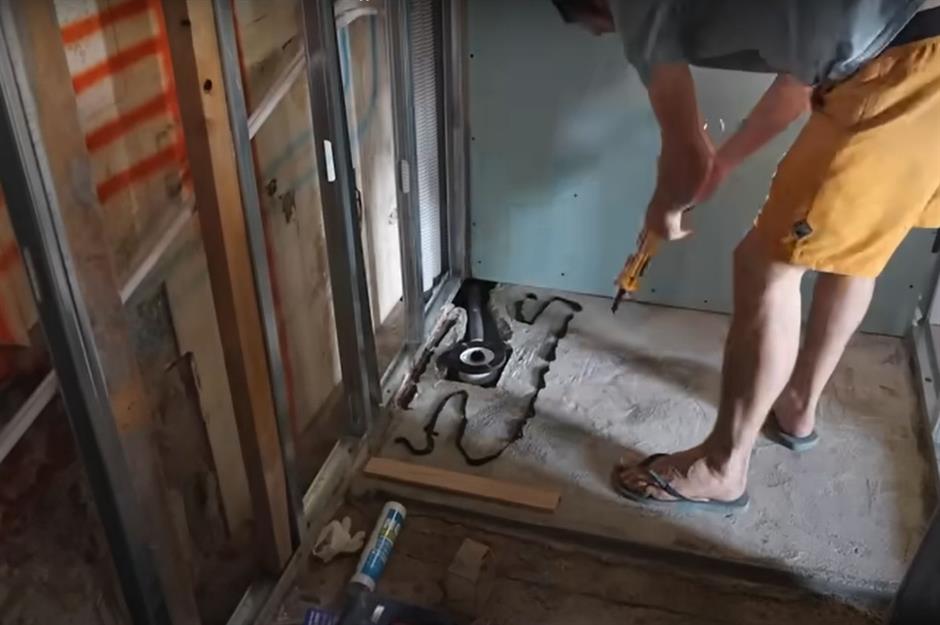
Amazingly, Nate installed the home's two bathrooms himself. In the main bathroom, he built the shower drainage system, tiled the walls, mounted the shower mixer, installed a radiator and the glass enclosure.
He even hand-made a vanity unit, on top of which the sink sits. Constructed from black steel and wood panels, the vanity has a marble top, created using old marble from the original kitchen. "It's modern, but has a link to the past," Nate says.
Rewiring and decorating
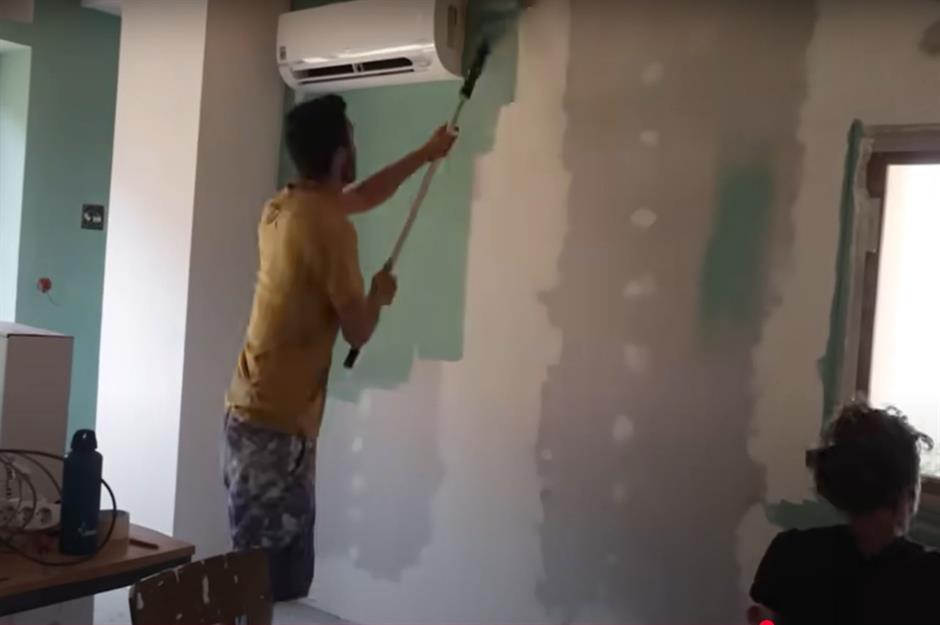
The house was totally rewired and, luckily, Nate's electrician friend was on hand to help him with this difficult and often dangerous job. Nate also installed air-conditioning, added radiators to some of the walls, installed a wood-burning fireplace in the living room and plumbed in a large water tank.
Once all the other jobs were done, Nate and Dei could decorate. They chose soft, neutral shades reminiscent of the colours found outside. Think light blues and greens, grey tones and accents of timber.
Final flourishes
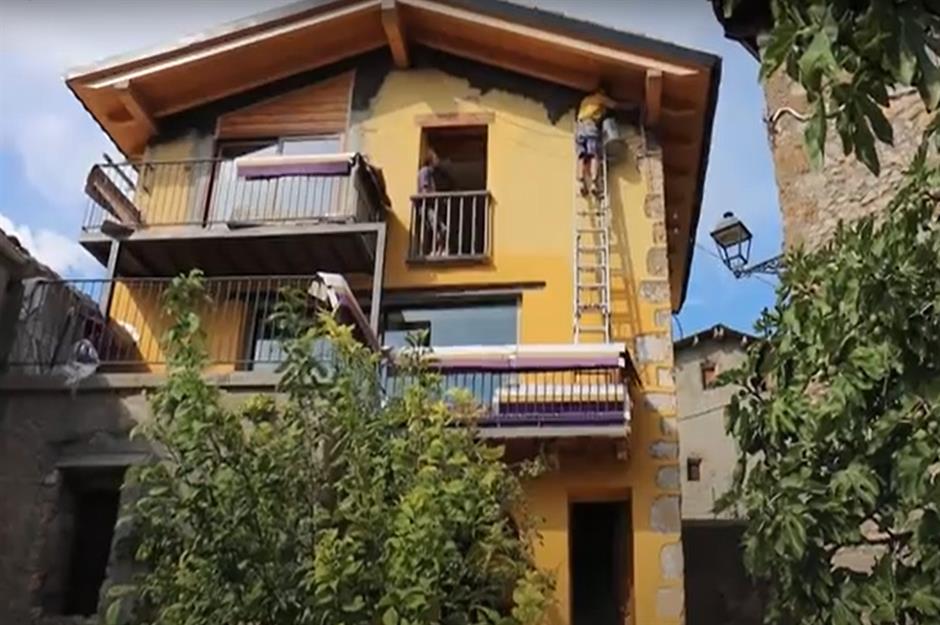
The exterior of the house wasn't overlooked, either. It was coated in a layer of render, for a fresh and watertight finish. Since a ladder couldn't reach the very top parts of the three-storey home, Nate was forced to get creative.
He tied two ladders together and, propping them on one of the balconies, used them to scale up the property to reach those out-of-the-way spots. He used a safety line to ensure he was attached to something, should he fall. As an avid climber, Nate knew the ropes (literally!).
4,000 hours later
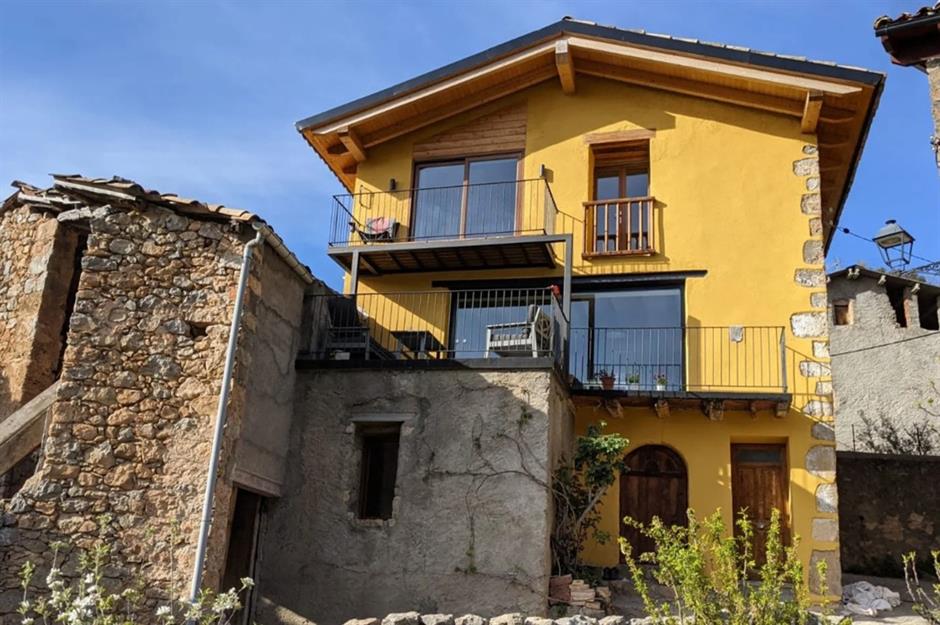
After an estimated 4,000 hours and 12 months of hard graft, the house was finished, and Nate and Dei could finally move out of their van.
The newly rendered exterior provides a nod to the original façade, thanks to its rich yellow hue. “The renovation cost around €65,000 (£54.8k/$74.2k), including the architect, lawyer, furniture, taps, fittings, even cutlery," Nate says. “If you were going to strip that down to the build materials themselves, we probably spent around €55,000 (£46.3k/$62.8k)."
Cosy and comfortable
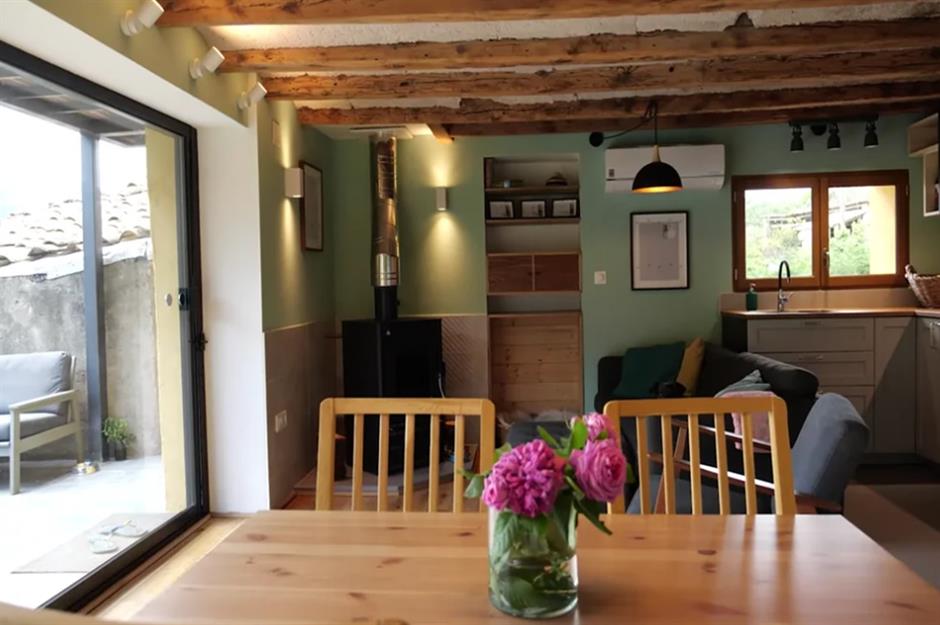
The heart of the home, this open-plan living area sits on the first floor and features a lounge, kitchen and dining space. Finished with those large glass doors, restored ceiling beams, custom built-ins and cosy furnishings, the space is unrecognisable.
The wood-burner helps to keep the room toasty during winter, but also connects to the home's radiators, warming the entire house. Solar panels on the roof allow Nate and Dei to generate their own energy, while a heat recovery unit ensures the air inside the home is always clean and healthy, protecting against damp.
Custom kitchen
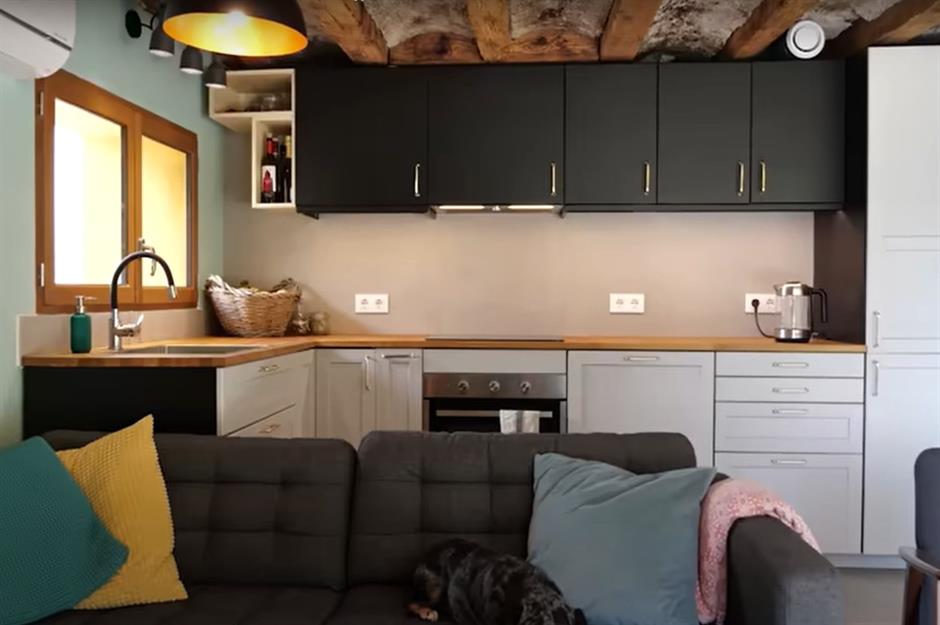
The couple's kitchen was sourced from IKEA and Nate assembled it himself. With two-tone blue cupboards and wooden worktops, it perfectly suits the overall theme of the house. The kitchen proved challenging, with the order being cancelled and delayed several times.
“The hidden side of the project is just how long it takes to order materials,” Nate says. “It’s knowing what to order, where from, when to order it and then working around the language barrier. I spent countless hours online, and it was the worst part of the build for me. I prefer to be carrying concrete upstairs with a bad back than sitting for hours ordering stuff that might never arrive.”
Room with a view
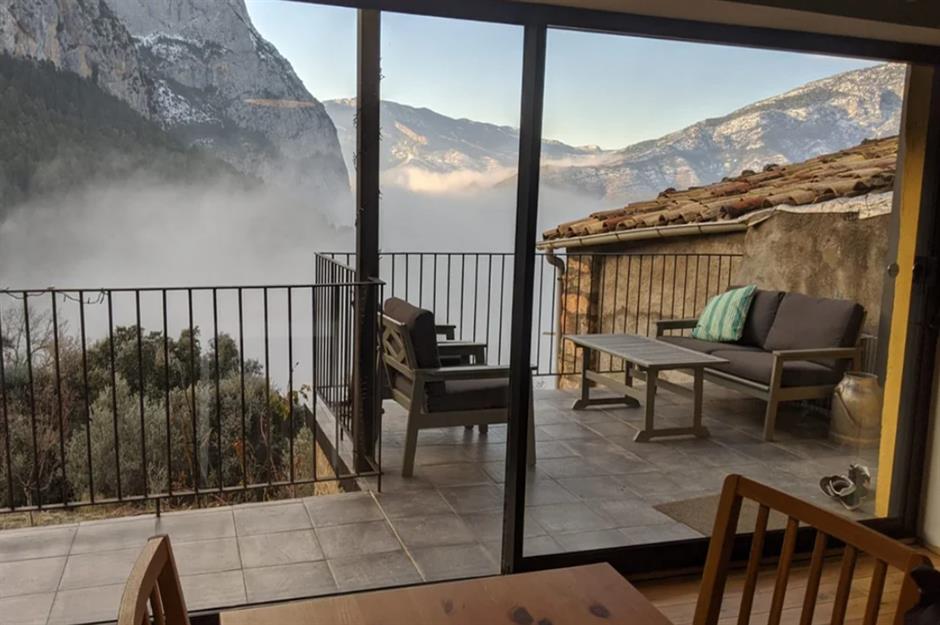
The new glass door not only allows for easy access to the large exterior balcony, where there's a sitting area, but also frames incredible mountain views across the Pyrenees.
"I hadn't done any house building work before, so I learnt a lot during the project," Nate says. "I taught myself how to do plumbing, electrics, welding, structural work, roof building, bathroom and kitchen installations, furniture making, tiling, heat recovery, solar installation and so much more. It was quite a journey! Hard work at times, but now I have a house, so it was totally worth it."
Tranquil bedroom
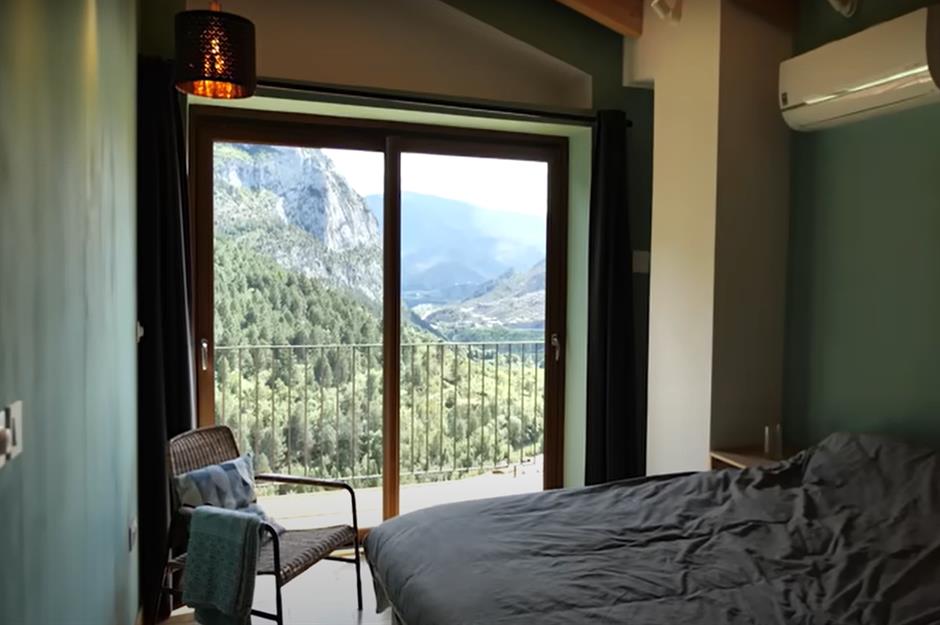
The main bedroom lies on the second floor and features a sliding glass door that connects to another balcony. This floor also features a guest bedroom with a Juliet balcony and a bathroom.
"I think by doing the project DIY, it saved me between €80,000 (£67.4k/$91.2k) and €100,000 (£84.2k/$114k) in costs," Nate says. "I was probably able to do it two years faster, too, especially as the pandemic would have stopped most contractors working for some months in Spain. The pain of doing it myself was probably the better option."
Blissful bathroom
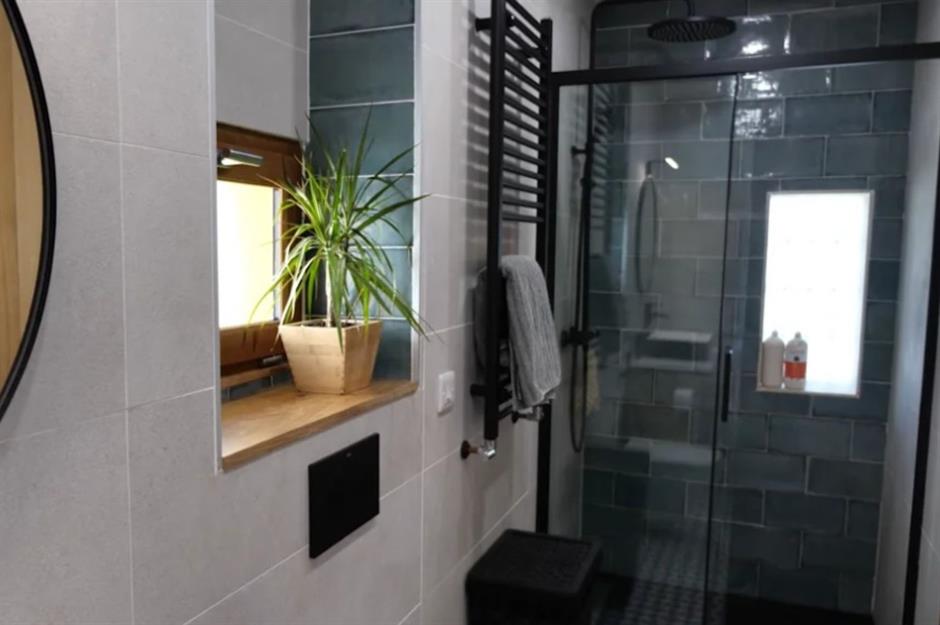
The couple's finished bathroom features sleek black fittings, including the shower itself, the radiator and the charcoal surround of the sliding glass shower screen. Two obscure glass block windows allow light to flood the space while maintaining the couple's privacy.
The barn that's attached to the house was also restored, with a new tiled floor. It's now the perfect alfresco area for dining, relaxing or simply soaking up the scenery.
Words of wisdom
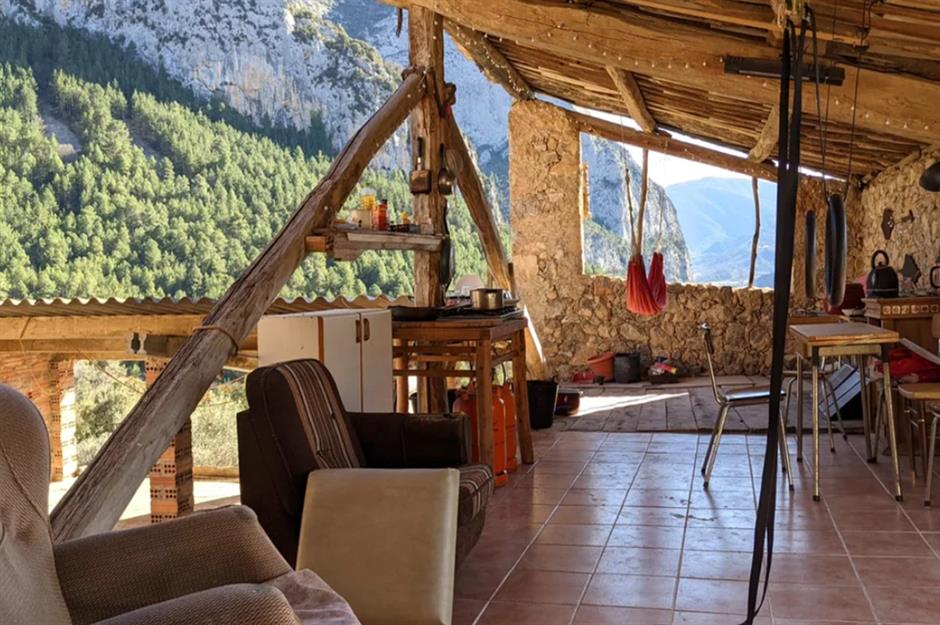
We asked Nate what advice he would give to anyone looking to undertake a similar project and he had a few wise words to share. "When I was growing up, my parents would always tackle the work in the house themselves, so the idea was quite embedded in me that you can do anything," he explains.
"That was probably one of the most useful things when doing the build. If you don’t believe that you can do it, then you won’t start. But when you're in it, you have no choice but to do the work, figure it out and make it happen."
What's next for Nate?
As for what's next for this serial van converter and (now) experienced house renovator, we'll just have to watch this space – and keep a keen eye on Nate's YouTube channel, of course.
If you're inspired by Nate's story and want to learn more about how he tackled the project, then you can buy his E-book, How to Buy & Renovate a House in Spain or watch his full DIY how-to YouTube video. We can't wait to see what's next for this fearless renovator!
Loved this? Take a tour of more amazing real home renovation projects
Comments
Be the first to comment
Do you want to comment on this article? You need to be signed in for this feature