How to fix cracks and holes in walls

When you're trying to create the home of your dreams, unsightly hairline cracks and crumbling plaster can really set you back. So, we've rounded up the best DIY hacks and quick fixes to help you whip your walls into shape – without spending a fortune!
Sadly, being a homeowner isn't all about choosing pretty tiles and scatter cushions, because when you own the place, you're responsible for ensuring its upkeep. We know that creating your dream home can often feel like a never-ending process, with another issue to fix as soon as one is resolved.
READ MORE: The ultimate DIY hacks
Scuff marks, cracks and even holes in internal walls are extremely common, thanks to daily wear and tear. In fact, Livlet – the UK's leading home management platform – recently revealed that Brits spend £13,500 on average, fixing typical structural issues around the home.
But luckily, savvy DIYers can fix most issues quickly and cheaply, with minimal tools and just a little bit of know-how. So, before you call in the professionals, try out these budget-friendly hacks and tips to bring your walls back up to scratch.
Assess the damage
First up, you need to ensure that any holes and cracks in your walls aren’t down to anything serious.
Cracks in interior walls can sometimes be a tell-tale sign of subsidence, a serious issue that occurs when the ground beneath your home begins to collapse, which can require major remedial works to your foundations.
What's more, it can reduce the value of your home by as much as 20%, according to a report by AgeCo.
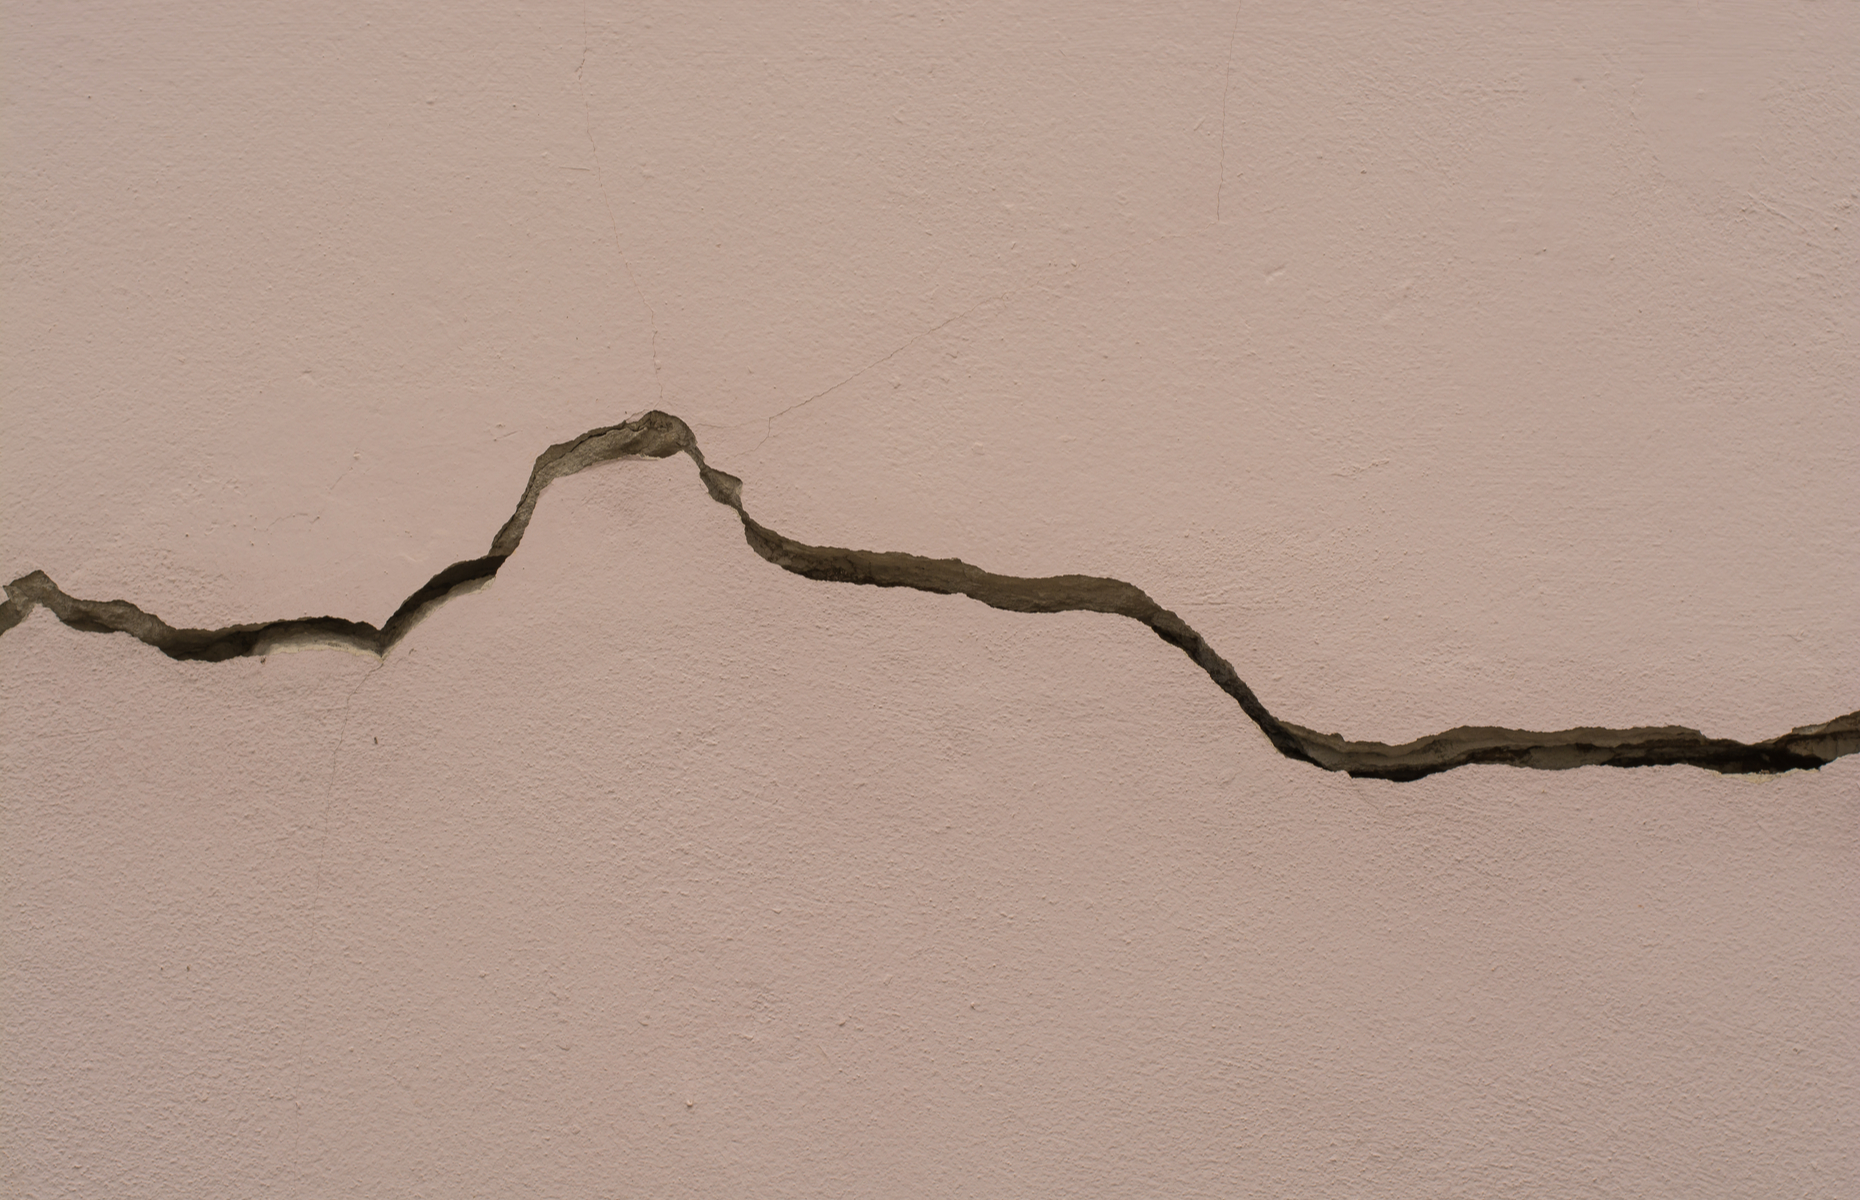
Early signs of subsidence include torn wallpaper or windows that are starting to stick, but the most obvious sign is the appearance of substantial cracks.
According to AXA, if the crack is thicker than a 10p coin, wider at the top than at the bottom and close to windows or doors, you might want to call a surveyor in.
However, the good news is most small cracks are not a symptom of subsidence. Instead, they're most likely caused by natural swelling and shrinkage, due to changes in temperature.
Once you've assessed the issue, you need to check whether the affected wall is plaster or plasterboard (also known as drywall), as this will dictate how you fix the problem. With plasterboard, you'll need to replace the section of board and plaster over it, while if you're dealing with plaster, you'll need to fill the void before you replaster.
Getting prepared

As with all potentially messy DIY jobs, it's important to cover the floor and nearby furniture with protective sheets. It's also worth turning off any radiators in the room, so the plaster doesn’t dry out too quickly.
To make your repairs, you'll need a plastering trowel, filler knife and a hawk – a special tool used to hold the plaster. It’s a good idea to have a bucket of water within easy reach, too, so you can clean your trowel as necessary to ensure a smooth application.
Before you begin, you should remove any old bits of plaster, grease or dust from the problem area. You want a smooth, clean surface to work with – and don't forget to wear safety goggles and gloves when you're preparing the plaster.
How to repair cracks in plaster
There are many different fillers and plaster products available, so be sure to consider the options and select one that is best suited to your job. For example, if you only need a small amount, you may find it easier to use ready-mixed plaster.
If the crack is quite shallow, you might want to dig it out a bit to give your filler a better chance of sticking. It’s also a good idea to spray the area with a little water, to stop the filler from drying too quickly.
Be aware that some plaster products shouldn’t be applied to a depth of more than 12mm in one go. If this is the case, you may need to apply it in multiple layers, leaving an appropriate amount of time between each application, to allow each layer to completely dry.
The experts suggest you work with small amounts on your trowel at a time, so you can build up a rhythm and cover the problem area before the plaster sets.
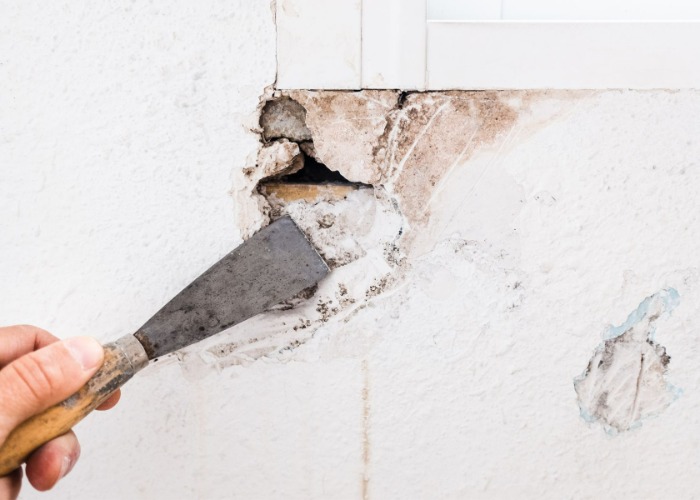
How to fix a hole in the wall
If there’s a small hole in your plaster wall, then we recommend you widen it a little with your filler knife, to give the filler a better chance of adhering.
Before you begin, clean the area with sugar soap and a clean sponge, before rinsing with warm water. This will create a smooth and debris-free area to work with. Press filler into the hole, smooth it over, then leave it to dry.
Once dry, use good-quality sandpaper to remove the roughness and create a level finish. Then, your wall will be ready to paint.
There are also a few really clever kits out there, that will provide you with everything you need to fix a hole with ease. The Artex Easifix wall repair kit is a particularly good option for novices.
How to repair a hole in plasterboard
Most plasterboard comes in either 9.5mm or 12.5mm thickness, so try to replace like-for-like when making repairs.
Before you cut through any plasterboard, Wickes advises using a cable, pipe and stud detector to ensure it’s safe to cut through. After all, you don't want to accidentally slice through any wires hidden in your walls.
Next, clean up any ragged edges around the hole and measure the area. Using a plasterboard saw or Stanley knife, cut a new piece of plasterboard to size, adding an extra 25mm or so at the top and bottom, to give you some leeway.
Drill a hole in the centre of your new piece of plasterboard and place a nail in it so that the long, pointed end of the nail faces outwards. Add adhesive to the overhang at the top and bottom of the plasterboard and carefully slide it into the hole.
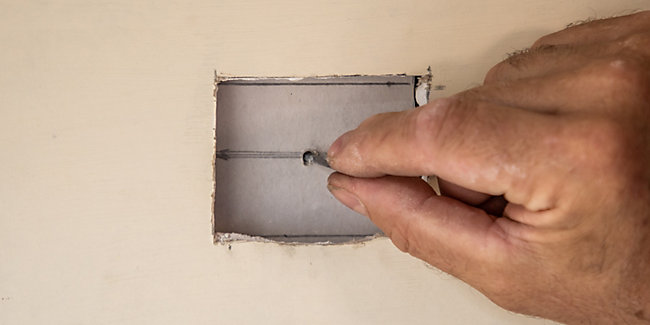
Image credit: Wickes
Use the nail to pull the plasterboard towards you, so that the adhesive bonds. Once dried, push the nail through so that it falls behind the plasterboard. You should then apply the plaster or filler until the patch is level with the plasterboard. When fully dry, use sandpaper to smooth it over before painting or wallpapering.
How to patch up corners
Carrying out neat repairs to corners is a much fiddlier task than repairing a hole or crack in the middle of a wall. In the case of cracks and shallow plaster damage, one trick is to apply filler, then add masking tape to both sides of the corner, to help it keep its shape as it dries.
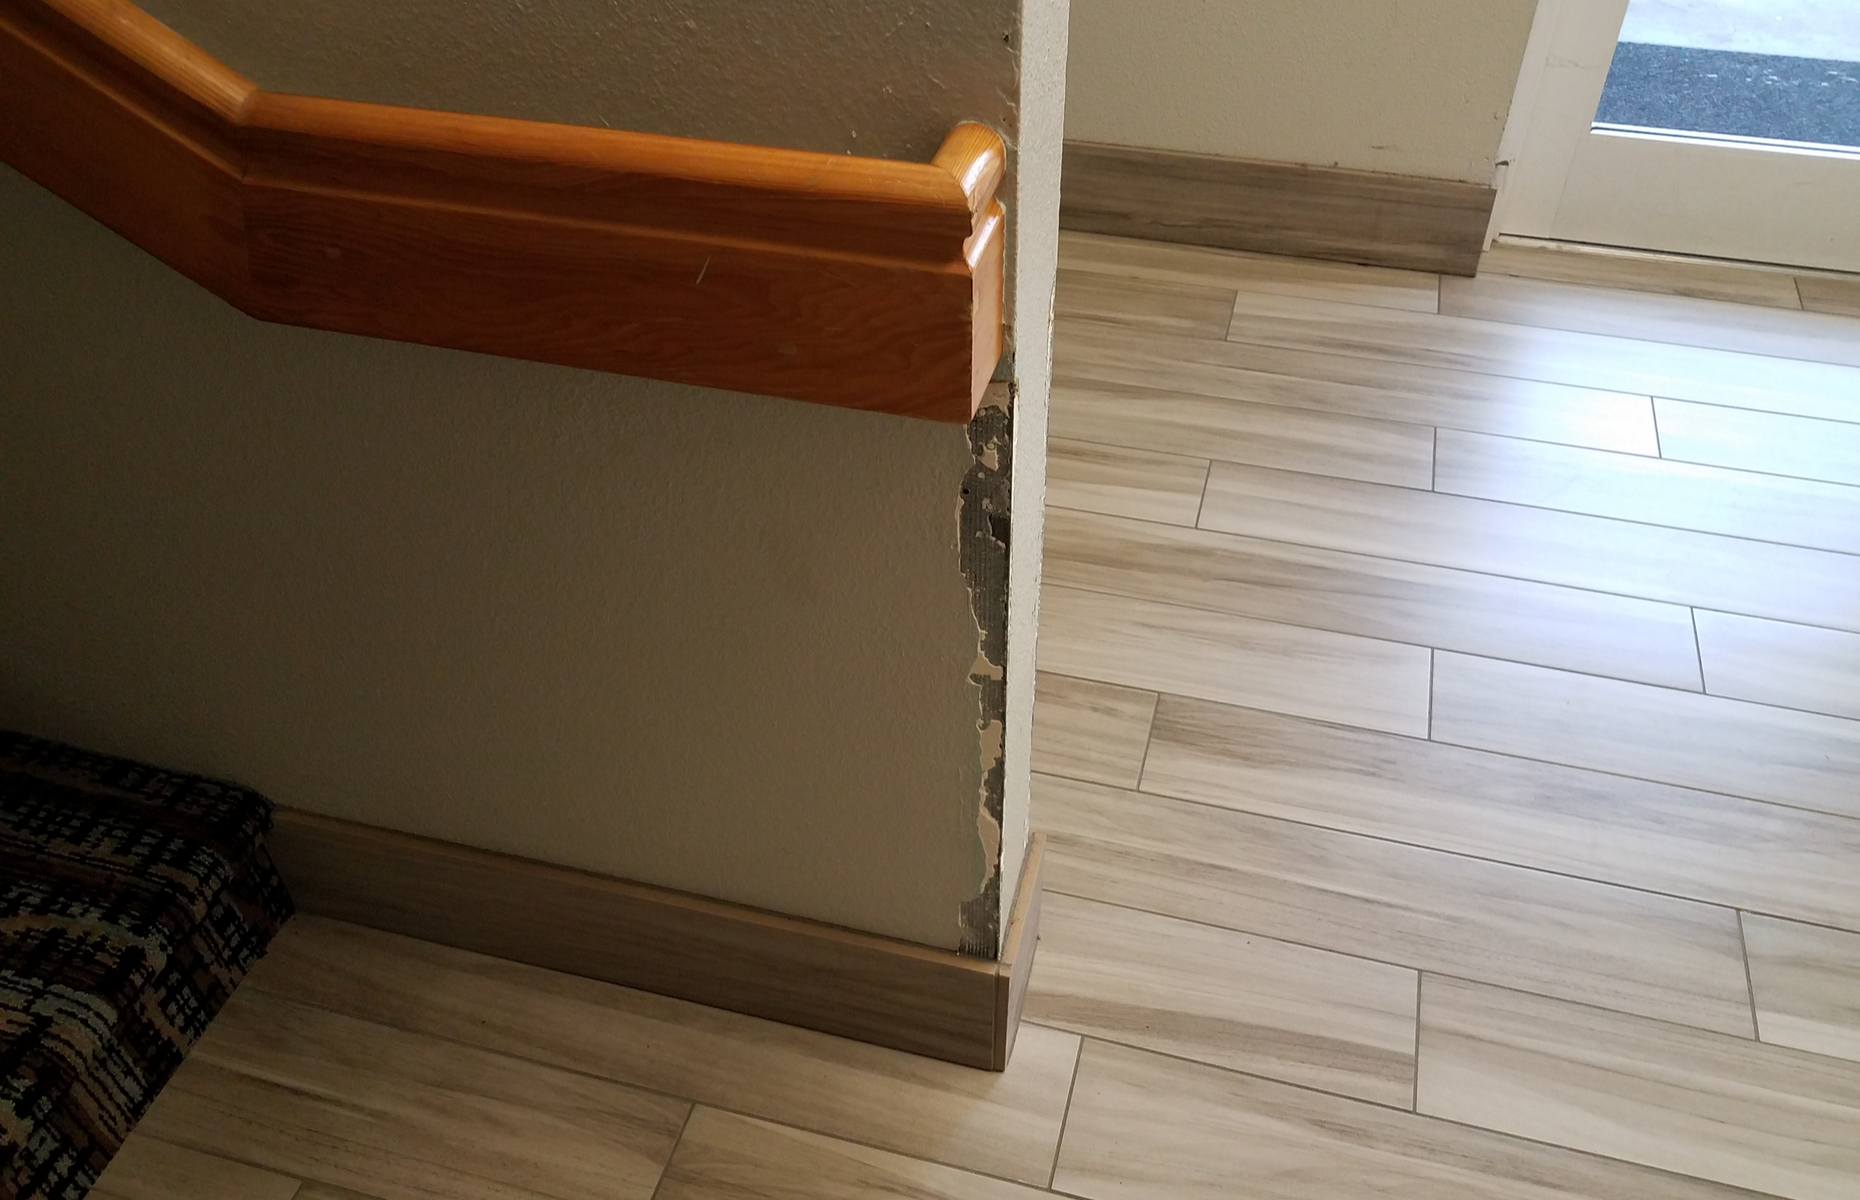
For larger chunks of missing plaster, you might want to use metal or plastic corner beading. To do this, remove any crumbling plaster with a chisel and hammer first. B&Q advises cutting the beading to the right length, and then painting the cut ends with primer to seal them.
Dampen the wall and add a plaster undercoat to each side of the exposed corner. Press the beading into place, allowing the plaster to seep through the holes. Then build up the undercoat plaster and scrape it back to leave a gap of 2mm from the old edge. Apply a top coat of finishing plaster, using a feathering motion to ensure it blends in.
If you use metal beading, you might want to brush metal primer over the corner before you decorate. This will prevent rusting.
How to keep mice and pests out
It goes without saying that mice and other pests will find even the smallest hole or crack to squeeze through. In fact, you might not even know you have a crack in your wall until an uninvited guest finds its way inside.
According to Accurate Pest Control, there are around 5.4 million mice in the UK and a whopping 81 million rats! Not only unhygienic, rodents can also chew further holes in your walls, damage wires and furniture and even get into your food cupboards.
But luckily, there's a genius hack out there that will spare you from the drama of having to deal with pests. Everyone's favourite household guru and cleaning expert, Mrs Hinch recently shared a simple solution for deterring mice.
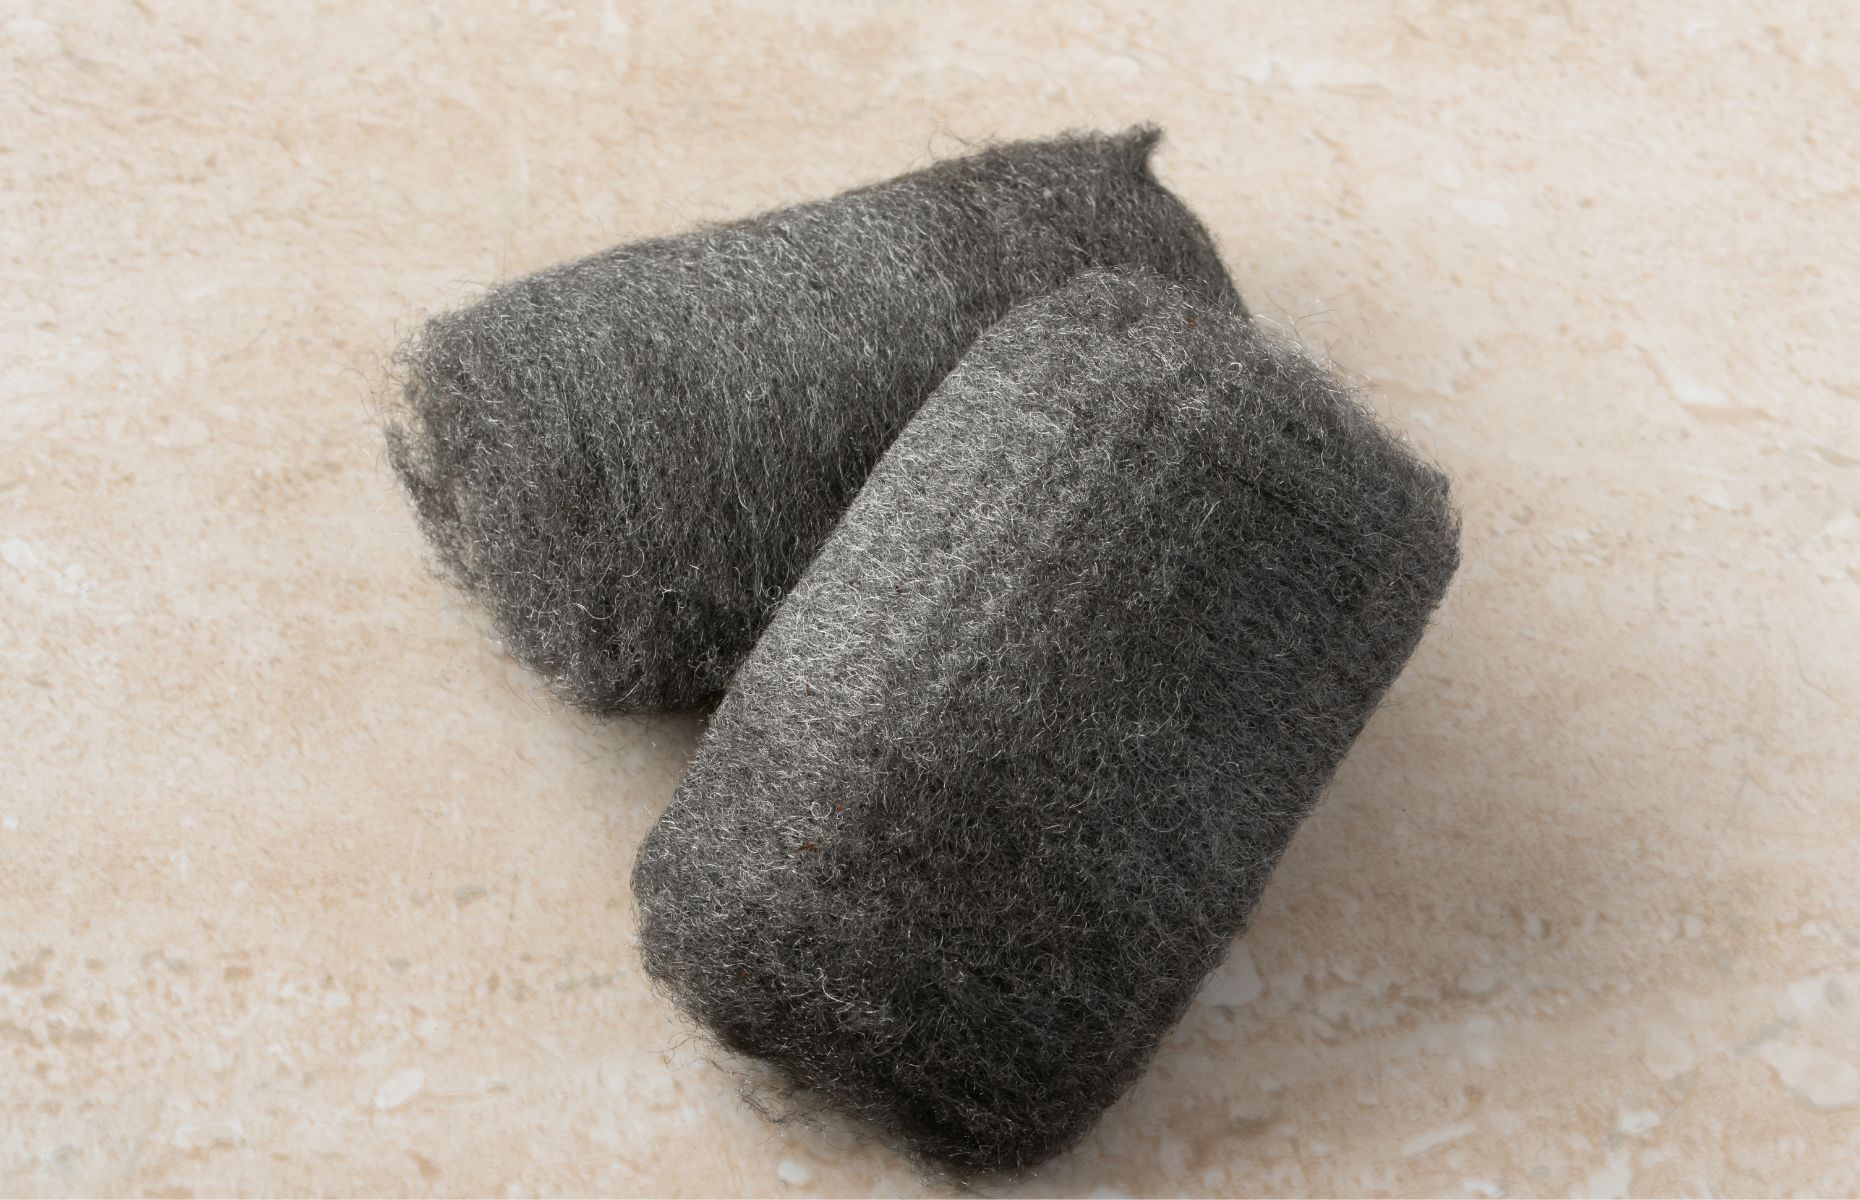
It's suggested that blocking any holes, big or small, with steel wool will stop pests from being able to get inside. Also known as wire wool, this simple and affordable household product can be bought from hardware stores and supermarkets for just a few pounds. Aluminium foil is also thought to work in the same way.
Some of Mrs Hinch's followers also suggested using Anti Mouse peppermint spray, since rodents are deterred by the smell.
READ MORE: World's worst property nightmares
Main photo: Joaquin Corbalan P / Shutterstock
Comments
Be the first to comment
Do you want to comment on this article? You need to be signed in for this feature